How many times have you taken what could be a great iPhone photo, only to find out that it’s blurry? While that happens to all of us, there are only three situations in which your photos can be blurry. In this article you’re going to discover why some of your iPhone photos end up blurry and what you should do to never take a blurry iPhone photo again.
Problem 1: Your Photos Are Out Of Focus
Inappropriate focus in one of the most common reasons why iPhone photos end up blurry. You know the focus is wrong when the important parts of the image are blurry while others are sharp, or when everything is blurry even though there’s abundant light in the scene.

In the photo above, the focus is incorrectly set to the extreme foreground. While the apples in the foreground are in focus and show a lot of detail, the more important human figures are blurry and out of focus.
Most iPhone users don’t adjust the focus themselves, and that works a lot of the time. With that said, there are times when autofocus fails, particularly when your photo has large uniform areas, when some parts of the photo are close to you while others are far, or when the scene changes rapidly.
Interestingly, you’re more likely to experience problems with focus on the newer iPhones, especially iPhone 5S which has a significantly smaller depth of field. While the small depth of field (which is caused by larger aperture) is awesome, it also means that you have to set your focus more carefully.
Solution: Stop Relying on Autofocus
The best thing you can do to avoid out-of-focus images is to always set the focus yourself. Simply tap on the part of the image that you want to be in focus, and your iPhone will take care of the rest.
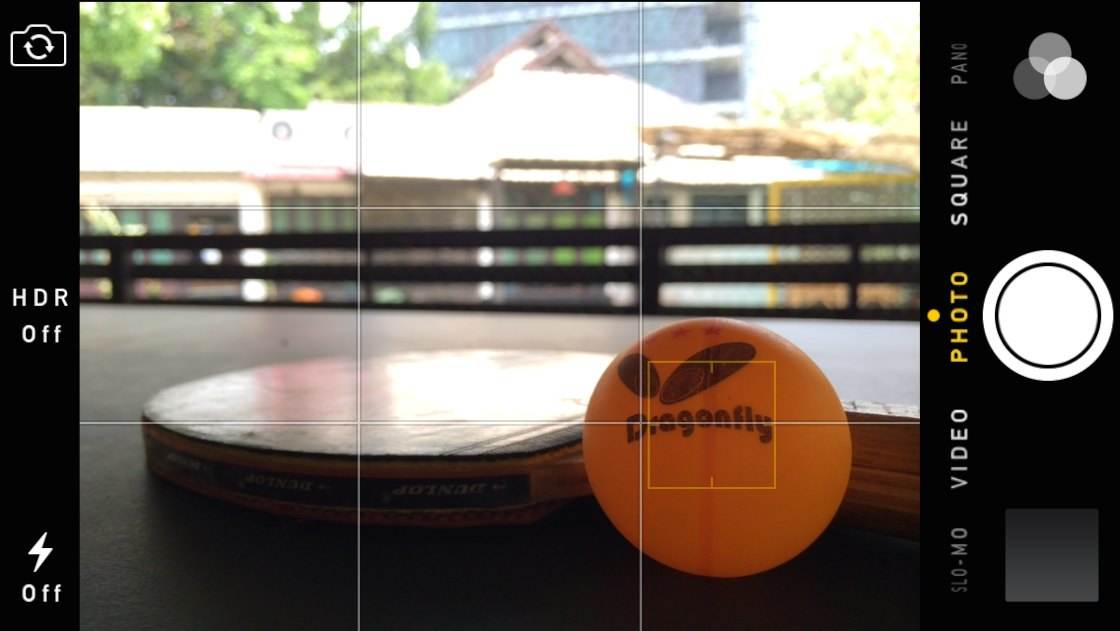
In this example I tapped on the tennis ball in the foreground, which set the focus (and exposure) on the ball. Notice how the ball is now really sharp, while the building in the background is blurry. You want to make sure that the important parts of the image are in focus by tapping the screen there.
However, even when you set the focus perfectly, the iPhone will automatically try to change it as soon as anything changes inside the frame. This can get quite annoying, especially if you’ve set the perfect focus yourself and all of a sudden it’s lost just because somebody walks into the scene.
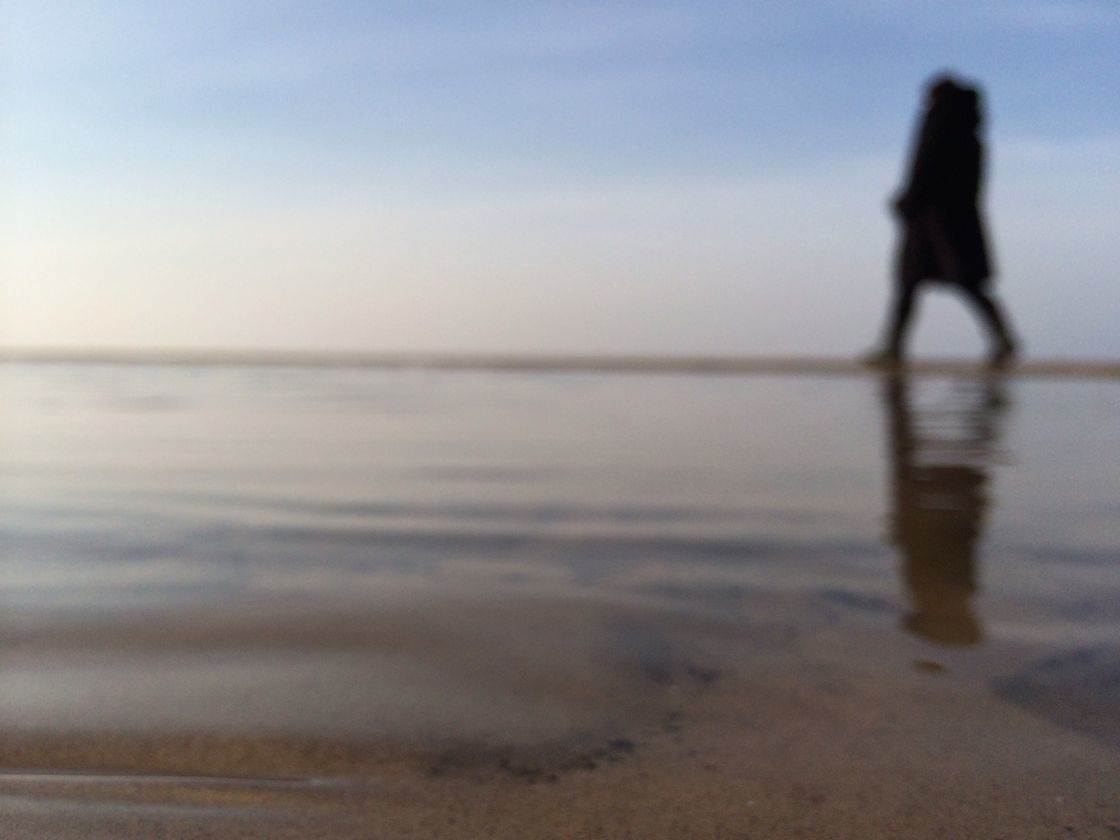
Even worse, sometimes the iPhone will try to refocus exactly when you’re trying to take a photo, which is what happened to me in the photo above. I was actually waiting for the woman to enter the frame so that the photo would have an interesting subject, but then the iPhone started refocusing and the moment was gone.
I should have locked the focus, which prevents the iPhone from refocusing when there are changes in the frame. You can lock focus (and exposure) easily by holding down your finger for a couple of seconds where you want the focus to be – a large yellow square and the text AE/AF LOCK appears when the focus is locked.
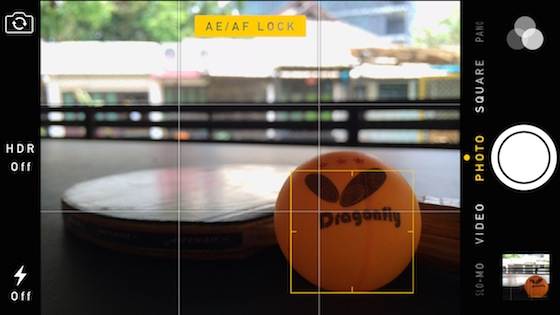
When the focus is locked, you’ve essentially disabled autofocus and the iPhone won’t adjust focus no matter what happens inside the scene, which is particularly useful when you expect someone to walk inside the frame and you want to make sure that the focus stays unchanged. To exit focus lock, simply tap the screen again.
While it requires more effort to set the focus manually every time you take a photo, it’s definitely worth doing if you want to make sure that your iPhone photos are always sharp.
Problem 2: Camera Shake
Before we discuss the other reasons why your photos may end up blurry, we have to take a step back and consider how the iPhone camera works. Even though we think about photos as moments frozen in time, it actually takes time for the iPhone to capture a photo, and if anything is moved during that time, that movement will result in blur.
When the light is abundant, as it is outdoors in the middle of a sunny day, the shutter stays open for such a short period of time that you don’t have to worry about camera shake. But when there’s less light in the scene (which is almost always the case indoors), the shutter stays open much longer and even moderate movement of the iPhone will be a problem.
To give you an example, the following photo is extremely blurry since I couldn’t keep my iPhone steady. I know this photo was blurred by camera shake because stationary objects both in the foreground and background are blurry as well.

Solution: Keep Your iPhone Steady
Now, what would happen to the same photo, taken from the same spot with the same iPro telephoto lens, if I could keep my iPhone more steady?
As you can see from this example, how steady your iPhone is makes a world of a difference, especially when the light in the scene is not abundant. But what can you do to actually keep your iPhone steady?
The first tip that I have for you is to take multiple photos. Since camera shake is random and unpredictable, it varies a lot between otherwise identical photos. So if you want to make sure your low light photos are less affected by camera shake, take multiple identical shots and some of them will always be sharper than others.
However, there are times when simply taking multiple photos won’t be enough and it’s really helpful to physically support your hands. There are many different ways you can do this. You can support your hands on a table or a railing, or support your entire body against the wall, all of which will make your iPhone more steady.
If no external support is available, try supporting your elbows against your torso, or crouch and support your iPhone on your knees. It also helps to relax and slow down your breath. Many photographers have found that their hands are more steady immediately after the exhalation.
When lighting is abundant, I typically take photos with the volume buttons on the side of the iPhone. However, unlike the shutter button of dedicated cameras, the volume buttons of the iPhone need to be pressed quite hard, and that will almost always lead to some camera shake. For this reason I recommend using the on-screen shutter button or the volume buttons on your white Apple earbuds for taking photos in low light.
If the photo doesn’t have any movement, another great way to stabilize your iPhone is using the Image Stabilization mode that you can find in dedicated camera apps such as Camera+. To access Stabilizer in Camera+, tap on the gear icon next to the shutter button and select Stabilizer. Now the photo will only be taken when the iPhone is steady, which may take a few seconds depending on how shaky your hands are.
Another obvious way to reduce the camera shake is to use an iPhone tripod, but there are clearly some disadvantages to carrying around a tripod with you. I use the Manfrotto 190XPROB tripod with Manfrotto 804RC2 tripod head, which provide great stability but are somewhat bulky. Smaller tripods have been a disappointment to me, which is why I recommend using a serious tripod that could also support a DSLR.

That’s me shooting with a tripod
You’ll also need to attach your phone to the tripod using an iPhone tripod mount. While there are many different tripod mounts on the market, nothing beats Glif+ in terms of how securely the phone is attached. Glif+ is available for iPhone 4/4S, iPhone 5/5S and iPhone 6s/6s Plus. When using a tripod, use the headphone shutter release so that you don’t shake the iPhone when pressing the shutter.
Problem 3: Motion Blur
Just like camera shake, motion blur occurs when movement is captured while the shutter is open. But unlike camera shake, motion blur refers to the movement of the subject itself. Just like camera shake, motion blur is more common in low light settings and practically non-existent in abundant light.

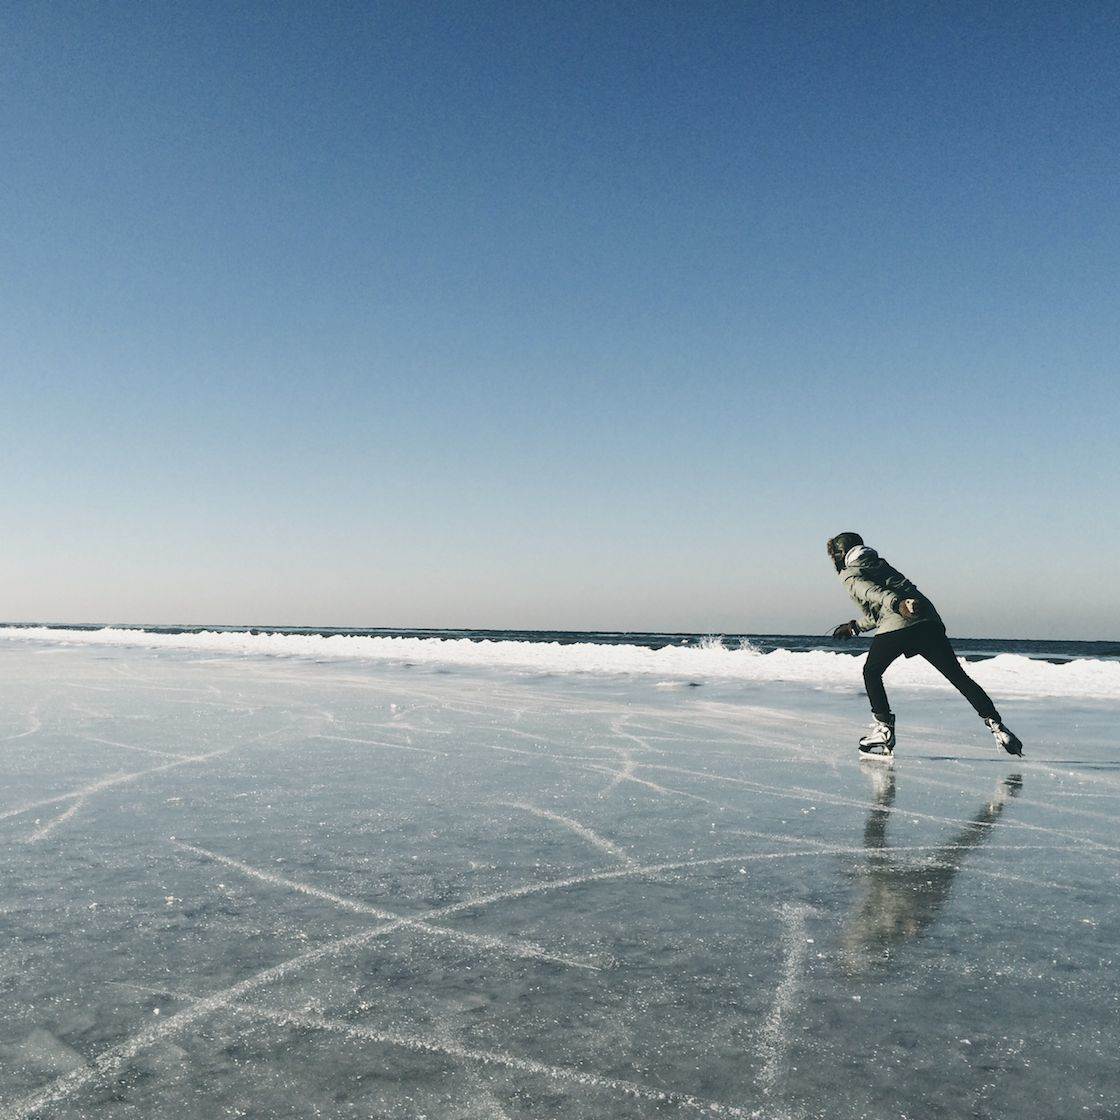
The above photo is a typical example of motion blur. The image itself is in focus and my iPhone is reasonably steady, so the man standing still at the back is perfectly sharp, except for his moving hand. However, the other man is blurry and this blur is caused solely by the fact that he’s rapidly moving through the scene.
Solution: Reduce the Effects of Movement
There are several things you can do to reduce the effects of motion blur. The two most obvious options are increasing the amount of lighting and asking for your subjects to stand still. Of course, these are often not practical, but it’s something you should consider when taking photos of people you know.
Just like with camera shake, the effects of motion blur can be reduced by taking multiple versions of the same photo. If the movements are unintentional, as they often are when taking photos of people you know, they tend to be quite random and some photos will naturally be much sharper than others.
It’s also good to know that motion blur becomes weaker and less prominent if the moving subjects are further away from your iPhone, which is a good option to consider when you have no control over the movement of your subjects.
Finally, you can reduce both motion blur and camera shake by setting exposure for the highlights, which in turn makes the photo darker and requires the shutter to stay open for a shorter time. After you’ve set focus by tapping on the screen, you can adjust the exposure by sliding your finger up or down on the screen. Slide up to increase the exposure (making the photo brighter) or down to decrease the exposure (making it darker).

Even though it was already close to sunset and there wasn’t much light left in this scene, I could still capture a sharp photo of birds taking off by setting exposure for the highlights.
