What is the HDR meaning in your iPhone Camera app? When should you use the HDR iPhone camera feature? And how does HDR help you take better photos in tricky light conditions? In this tutorial, we answer all your iPhone HDR questions. And you’ll discover how to use HDR to shoot perfectly exposed photos with your iPhone.
Table Of Contents: HDR iPhone Photography
Click any title link below to go straight to that section of the tutorial:
1. What Does HDR Mean?
2. What Is HDR On iPhone Camera?
3. When To Use iPhone HDR
4. When Not To Use HDR
5. How To Take An HDR Photo With Your iPhone Camera
6. Use Pro HDR X App For Ultimate HDR Control
1. What Does HDR Mean?
HDR is one of the best iPhone camera settings in your Camera app. But what does HDR mean?
HDR stands for High Dynamic Range. It works to create perfectly lit photos with more color and detail in both the bright and dark areas.
Dynamic range refers to the difference between the lightest and darkest tones in a photo.
The human eye can see a much greater dynamic range than any camera. You can easily see the details of a dark subject against a bright sky. But what happens when you take a photo of a scene like that?
Your iPhone camera isn’t capable of capturing detail in the very dark and very bright areas at the same time. If you’re shooting a high contrast scene, you’ll likely have exposure problems in your photo. (Exposure refers to the brightness of an image).
Your photo might have shadows (dark areas) that are well-exposed with plenty of color and detail. But the highlights (bright areas) are over-exposed (pure white with no color or detail).
Or the highlights will be well-exposed with plenty of color and detail. But the shadows appear under-exposed (very dark with no color or detail).
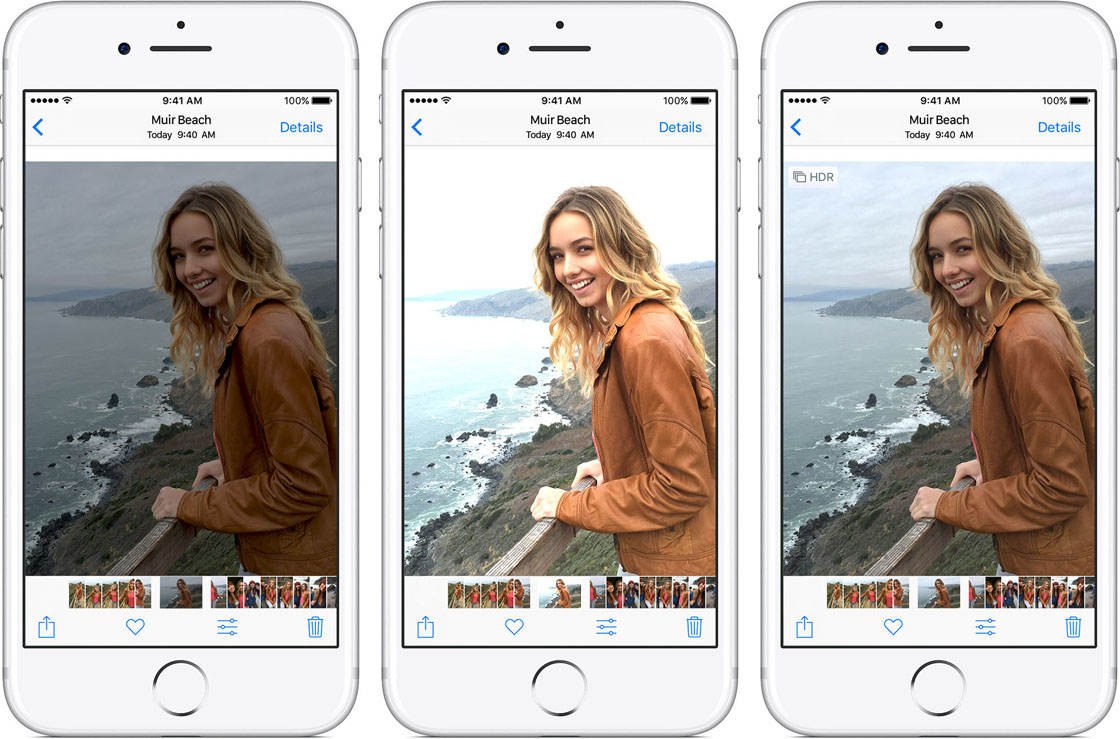
The HDR setting on your iPhone will solve these exposure problems. With HDR you can capture well-lit photos with a balanced exposure throughout.
The HDR photo above shows how much color and detail can be captured in both the dark and bright areas of the scene.
If the HDR meaning sounds complicated at first, don’t worry! HDR is super easy to use on the iPhone. And it means you no longer have to worry about exposure problems in your photos.
2. What Is HDR On iPhone Camera?
So, how exactly does the HDR iPhone camera feature work? When you use HDR, the camera captures several different exposures at different brightnesses. The camera then blends the best parts of these exposures to create a single well-lit image.
As a result, the dynamic range of the photo increases. This means you’ll see more color and detail in both the shadows and the highlights.
While this process might sound complex, the good news is that the iPhone does it all for you. All you need to do is switch on HDR and take a photo. The camera will shoot and combine the three exposures to create your HDR image.
3. When To Use iPhone HDR
The iPhone HDR feature is great for shooting high contrast scenes with dark shadows and bright highlights. With HDR switched on, you’ll be able to capture far more detail in both the bright and dark areas of the scene.
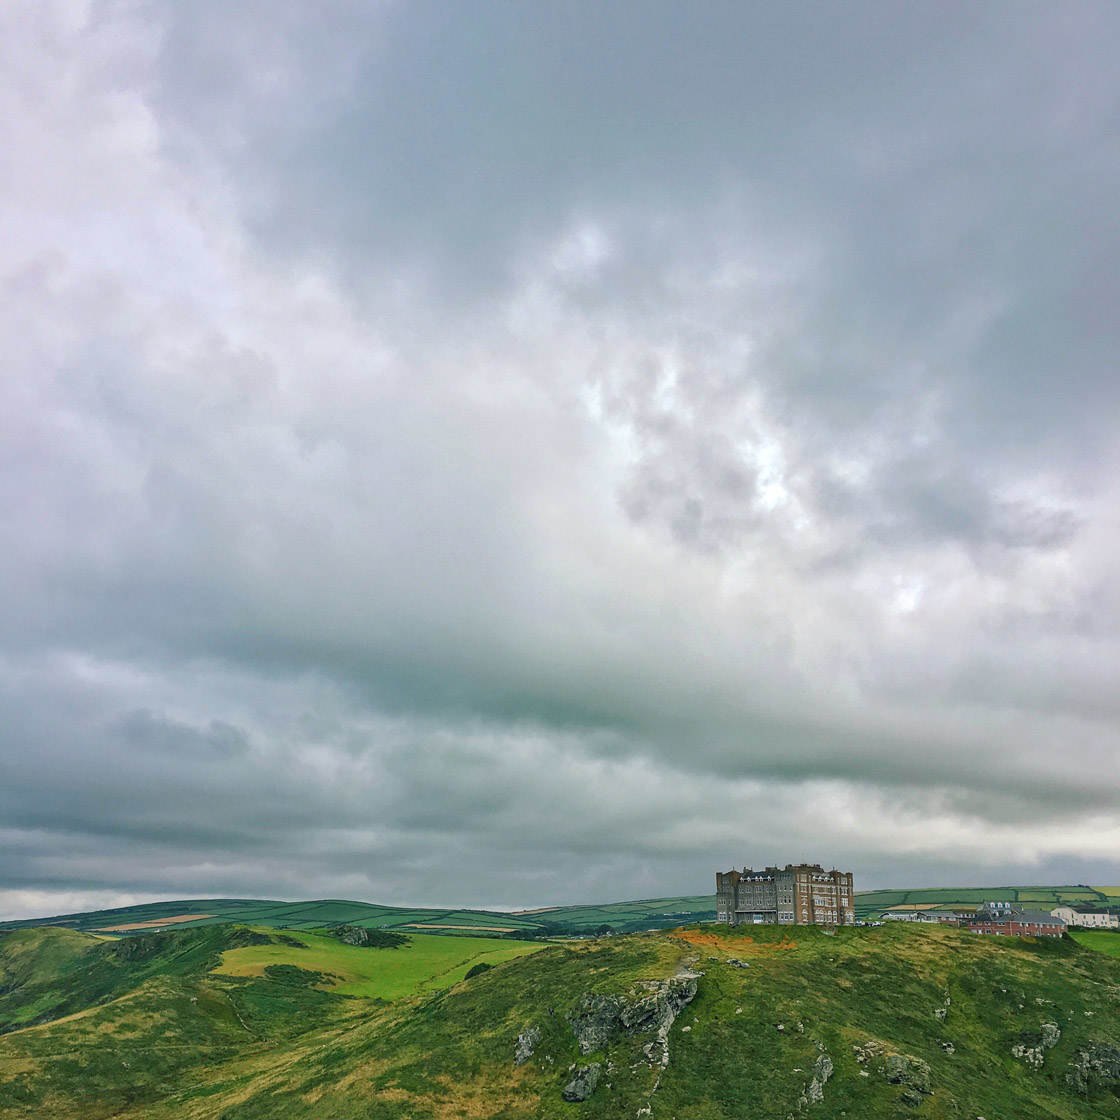
HDR is perfect for landscape photography. Landscape scenes are often high contrast, with the foreground much darker than the sky.
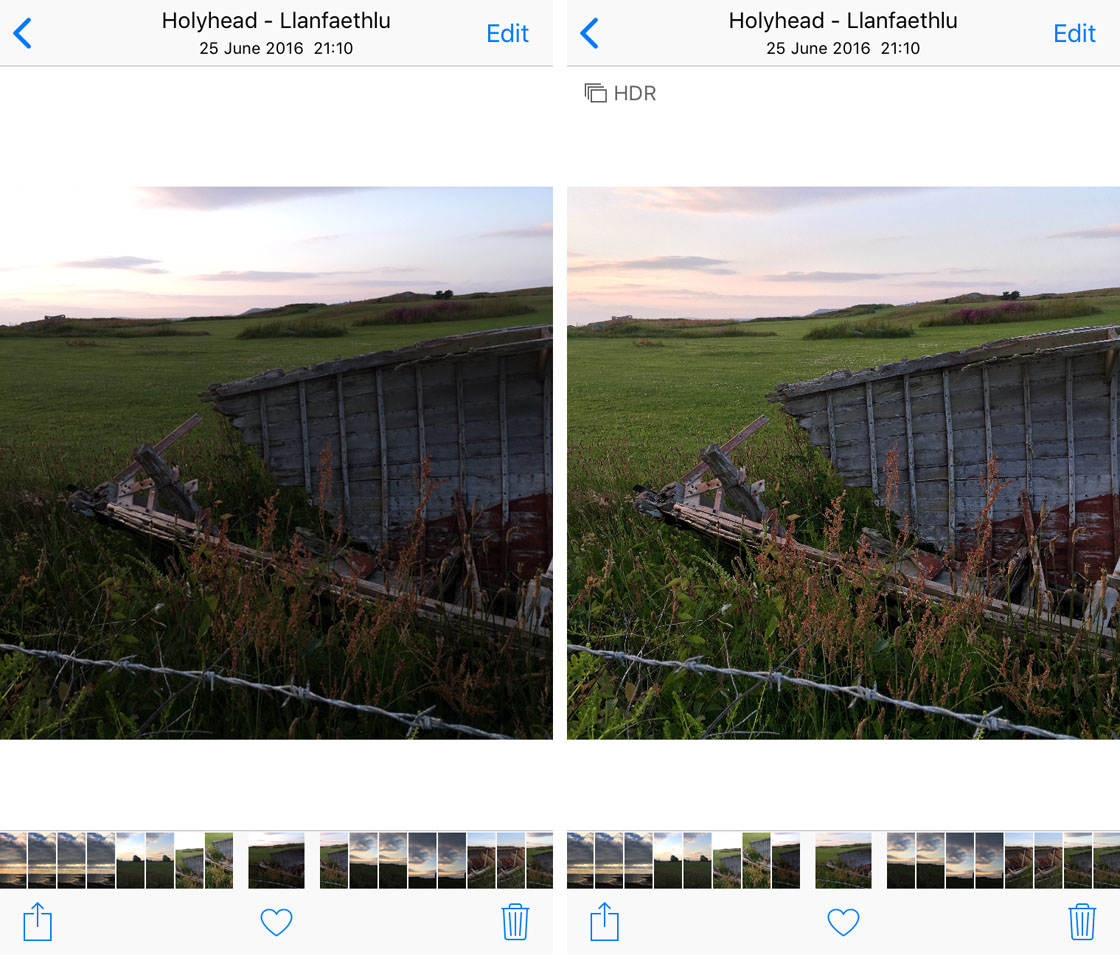
The photo below was shot without HDR. The brighter parts of the sky are completely over-exposed. They appear pure white with no color or detail. The darker areas, such as the boat and plants in the foreground, appear slightly under-exposed. It’s difficult to make out the detail in these areas.

Now compare the above image to HDR version below. Using HDR has resulted in a perfectly lit photo with plenty of color and detail in both the foreground and the sky.

Of course, HDR isn’t only for landscape photography. It can be used in other shooting situations with tricky lighting conditions.
If you’re photographing an object in direct sunlight, dark shadows are likely to be cast within the scene. Using HDR will brighten up the shadows while ensuring the highlights aren’t over-exposed.
If your subject is backlit (with the light source behind them), use HDR to ensure the subject doesn’t appear as a dark silhouette against the bright background.
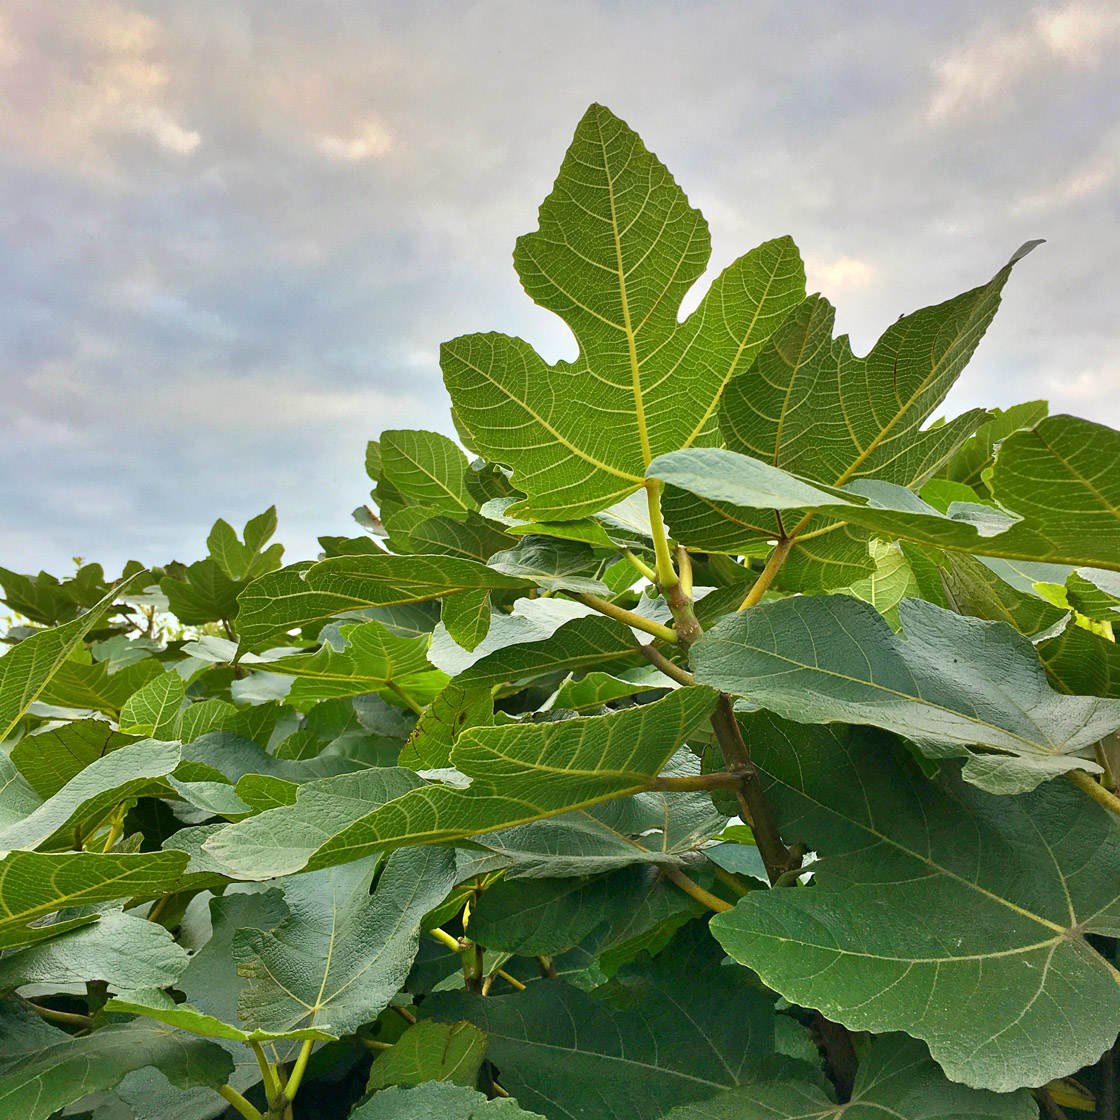
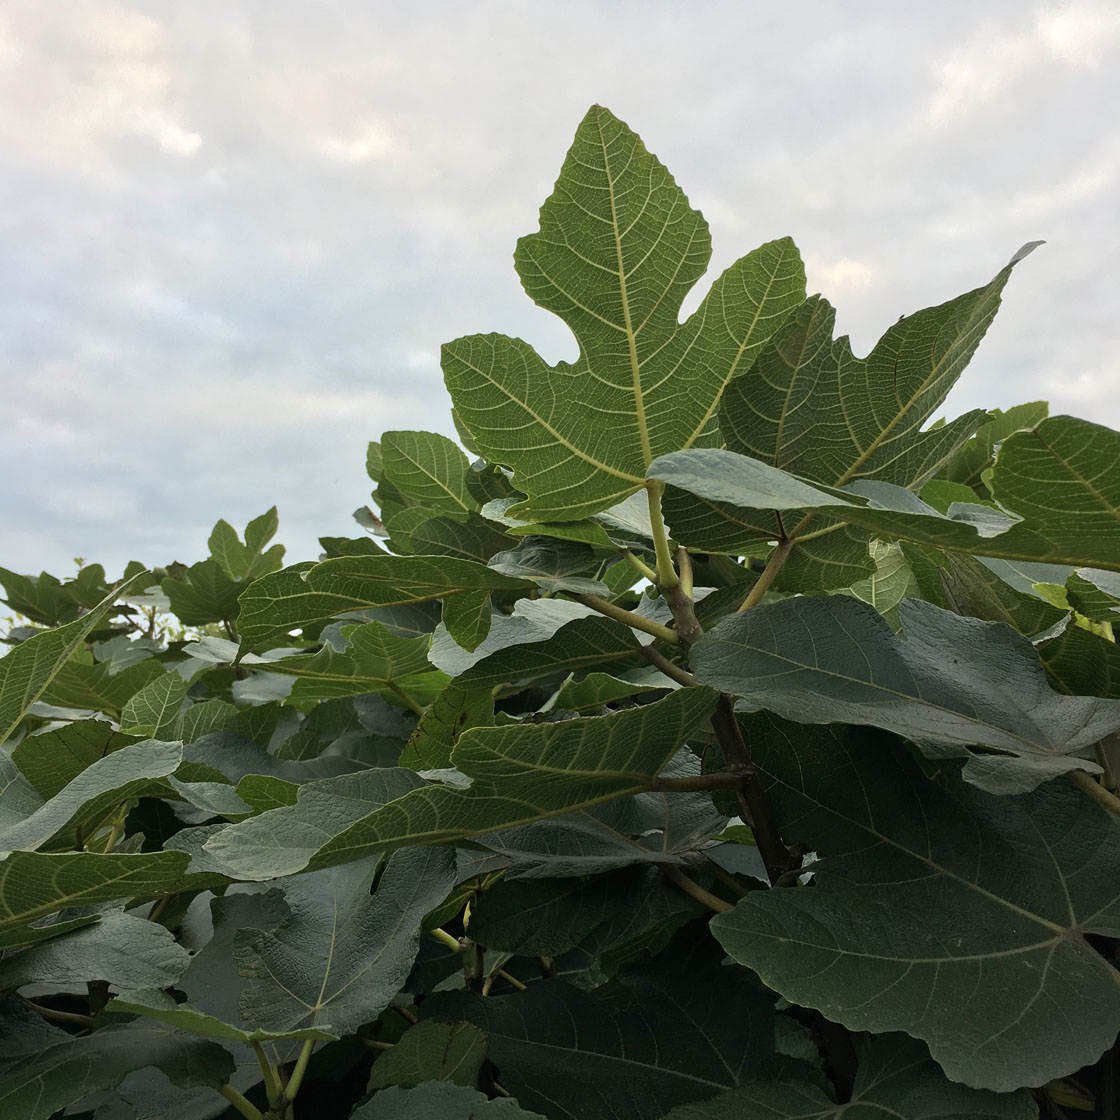
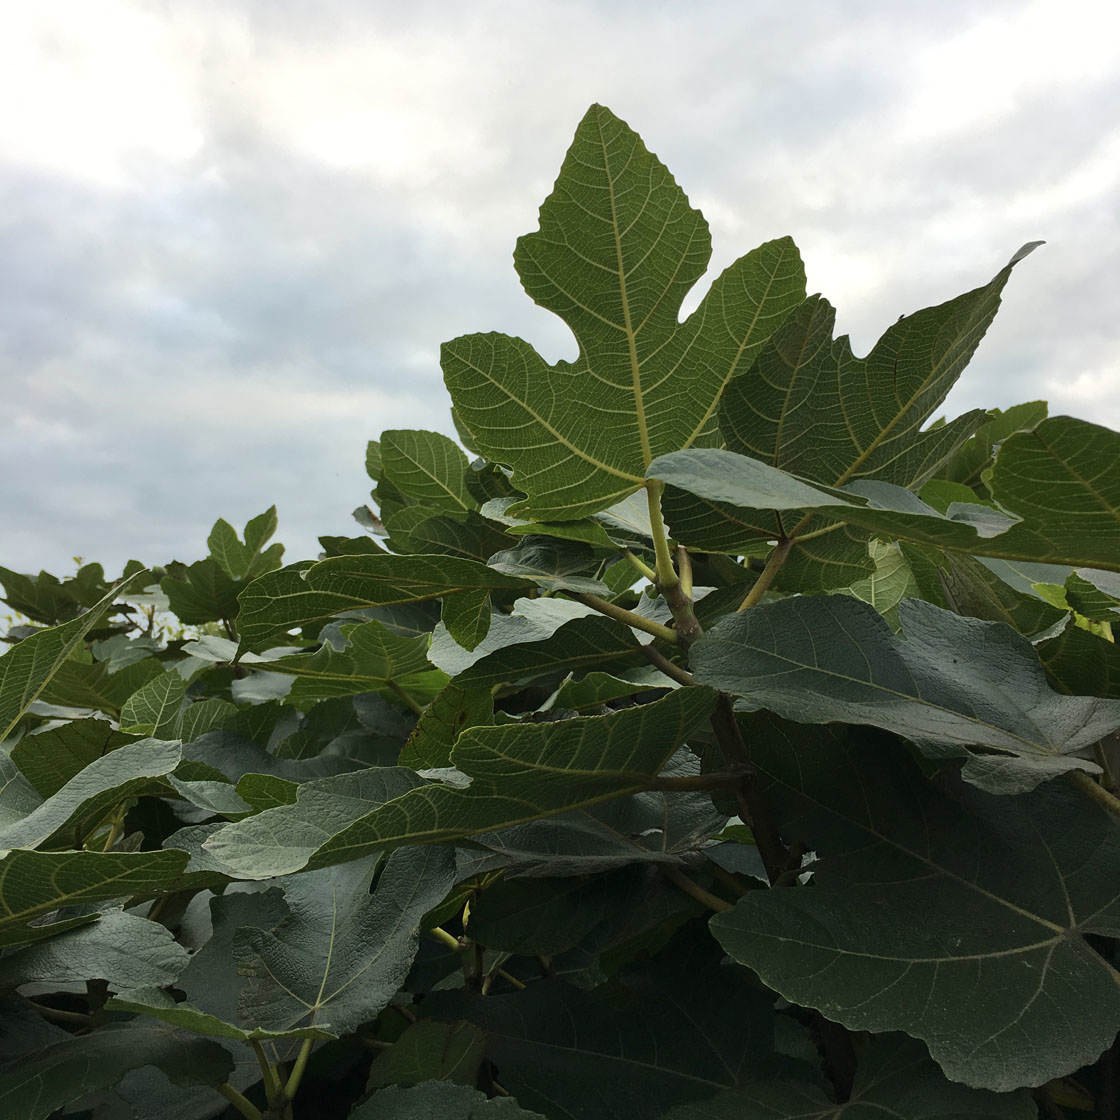
The examples below show how you can use HDR when photographing a shaded subject against a bright sky. Rather than having to choose between a subject that’s too dark, or a sky that’s too bright, HDR gives you the best of both.
As a general rule, use HDR if you’re struggling to get a good, balanced exposure. If the shadows appear too dark or the highlights are too bright, switch on HDR in the Camera app.
4. When Not To Use HDR
There are, of course, times when you shouldn’t use HDR. Knowing when to use it, and when not to use it, is key to capturing the best quality photos in different situations.
If you want to intentionally capture the high contrast nature of a scene, keep HDR switched off. For example, if you’re shooting in harsh sunlight, the contrast between light and shade can create wonderfully dramatic compositions.
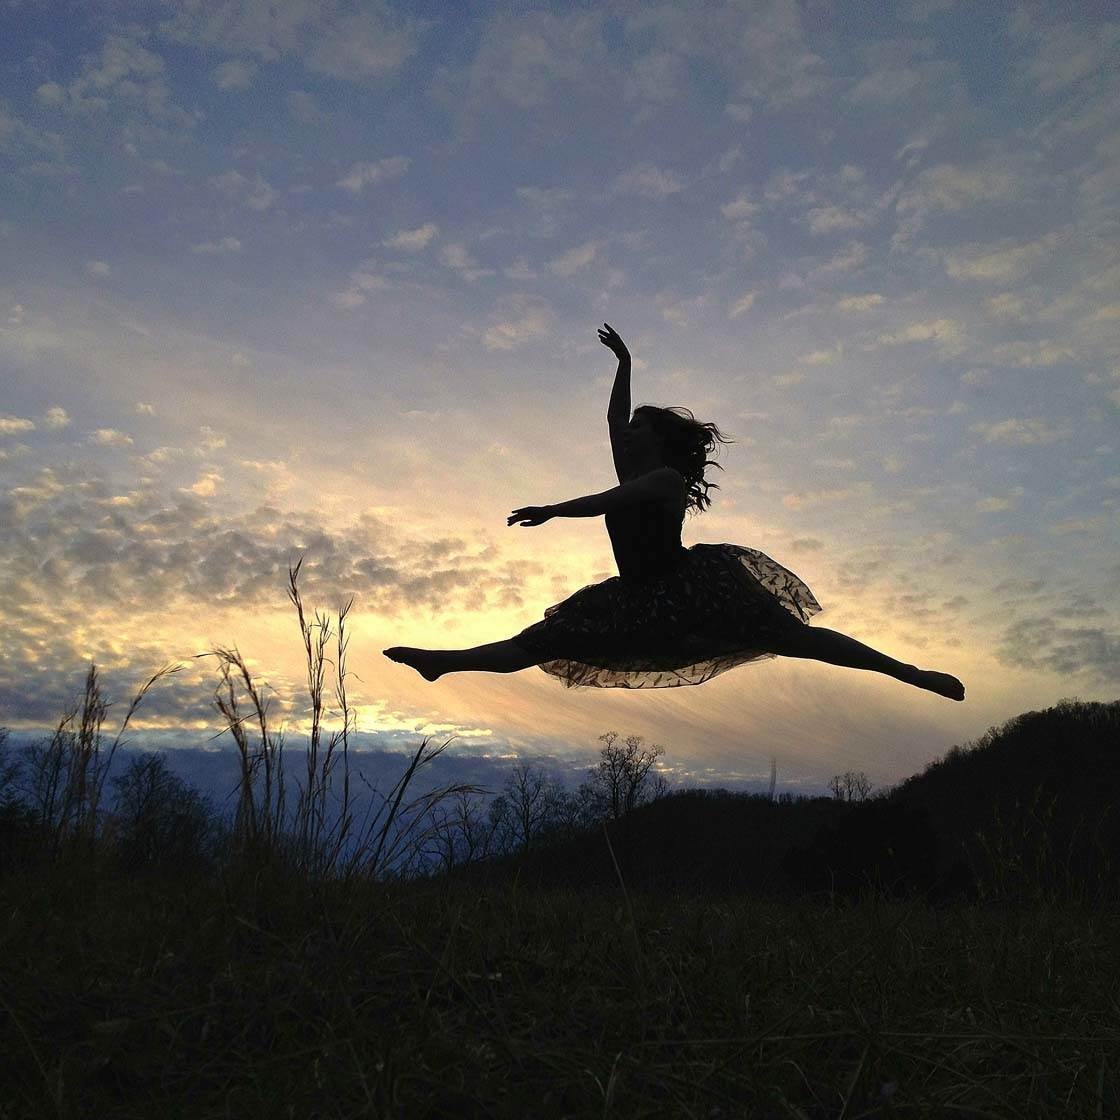
If you want to create a silhouette photo, where the subject appears completely black against the bright background, don’t use HDR. If you switch on HDR, the shadows will appear brighter and you won’t get the dark silhouette effect.
The new iPhone XS camera, iPhone XS Max, and iPhone XR have a Smart HDR feature. This allows you to capture sharp HDR photos of moving subjects.
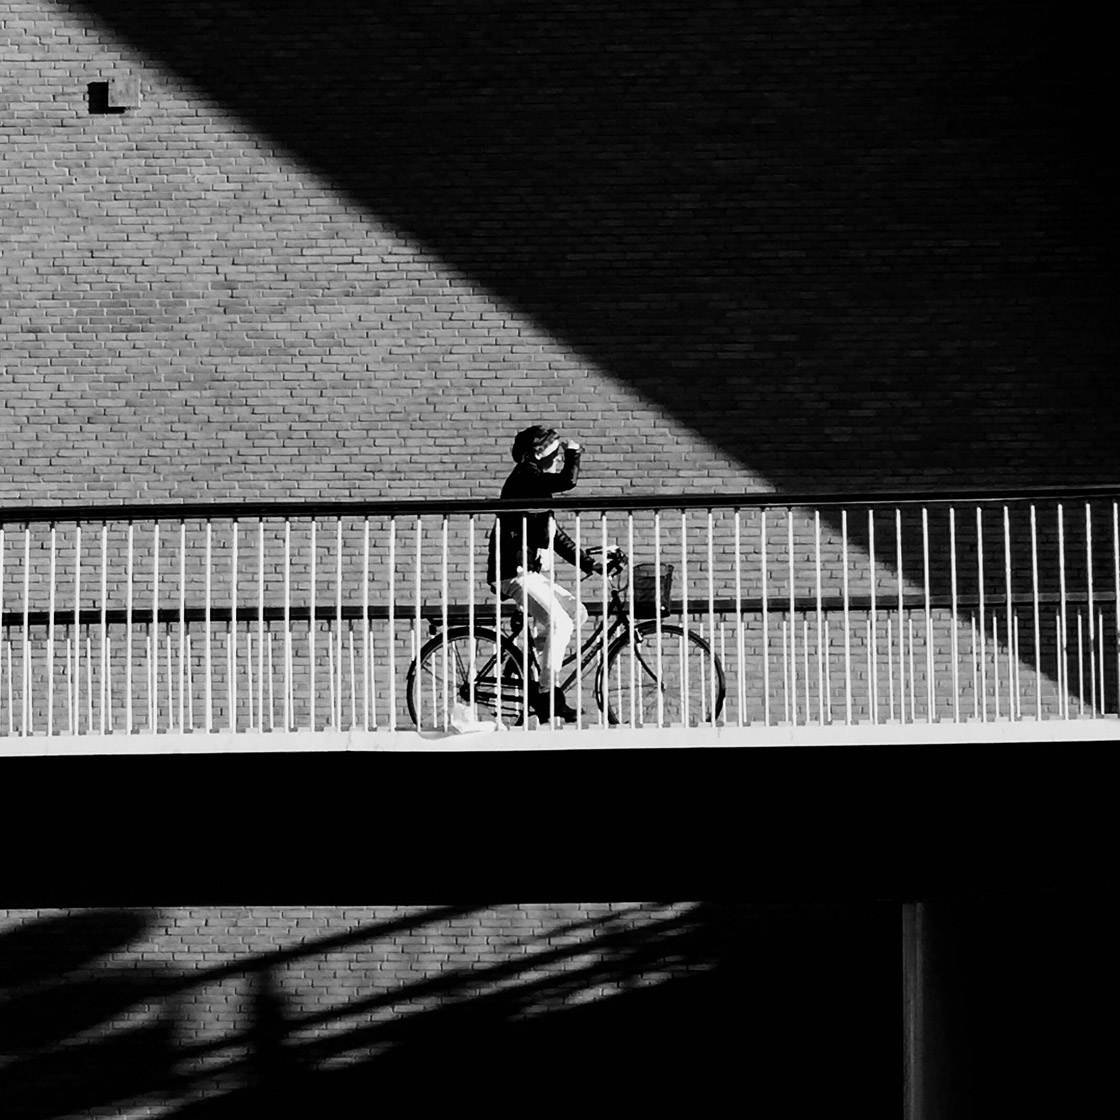
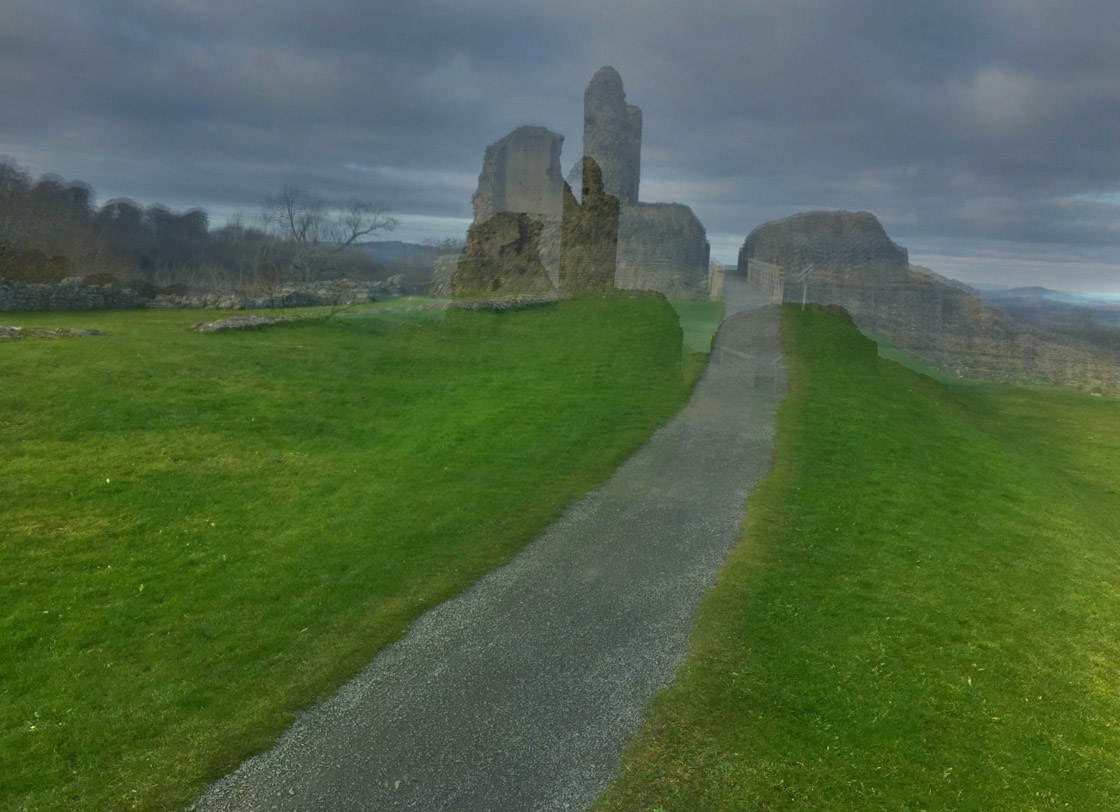
But the older iPhones don’t have Smart HDR. If you have an older iPhone, be wary of using HDR when photographing moving subjects. If the subject is in different positions in each exposure, you’ll get a ghosting effect as shown below.
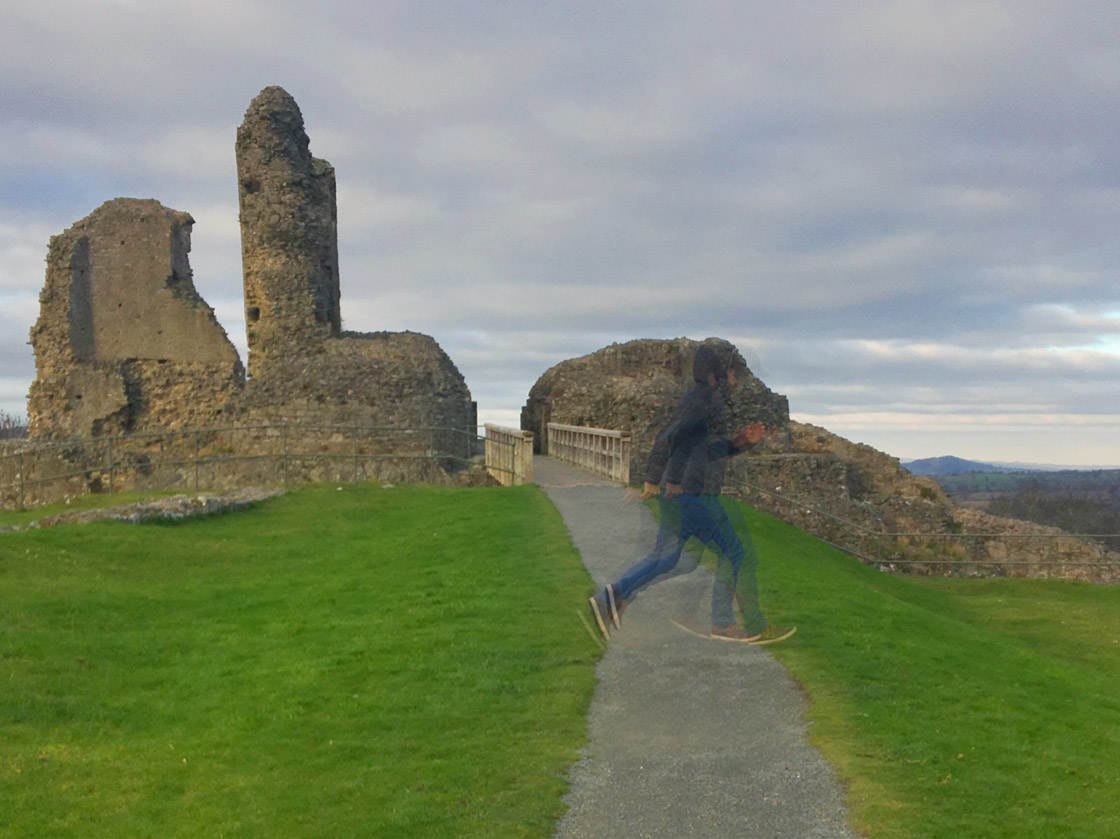
The same goes for situations where you can’t keep your iPhone steady enough while the photo is being taken. This is especially important when shooting HDR photos in low light.
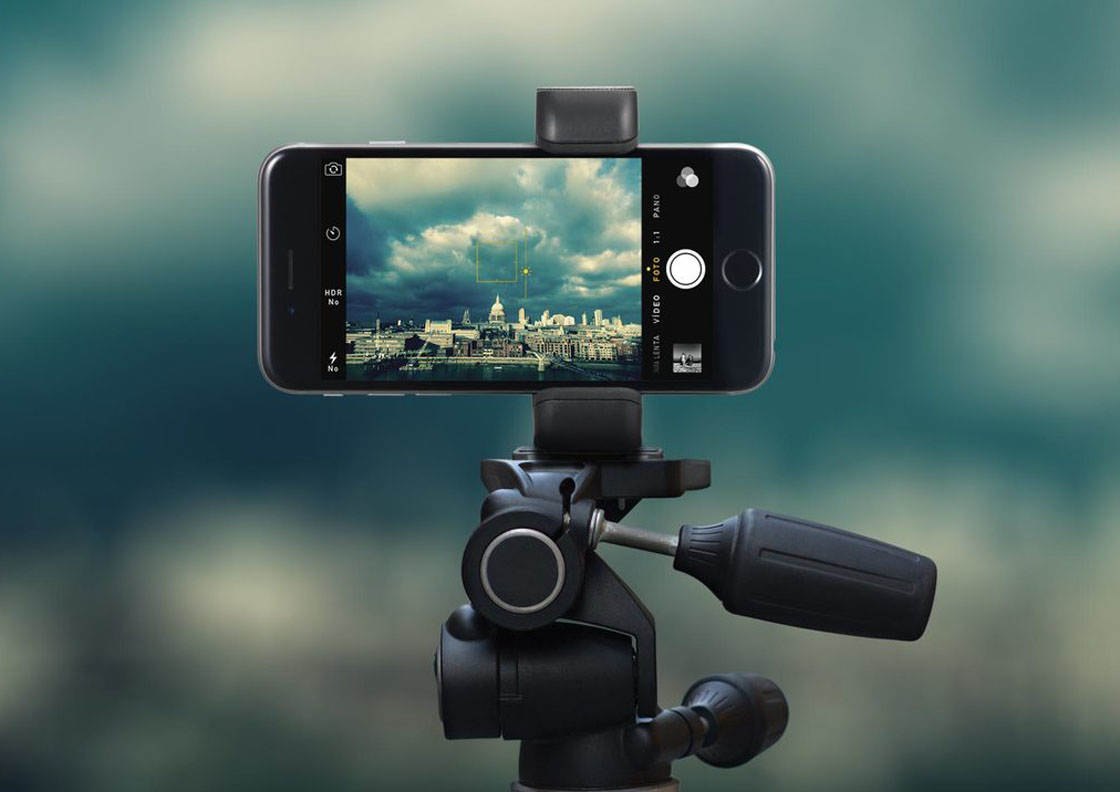
For best results, use an iPhone tripod and iPhone tripod mount. If you don’t have a tripod, keep your phone steady against a solid surface. This ensures it remains perfectly still while capturing the multiple HDR exposures.
5. How To Take An HDR Photo With Your iPhone Camera
Now that you understand what HDR is, and when to use it, let’s look at how to shoot HDR photos in the native Camera app.
Before you open the Camera app, you need to check your HDR settings in the Settings app.
Go to Settings > Camera. Then ensure Smart HDR (Auto HDR on older iPhones) is switched off. If Smart HDR is on, you won’t have the HDR option in the Camera app.
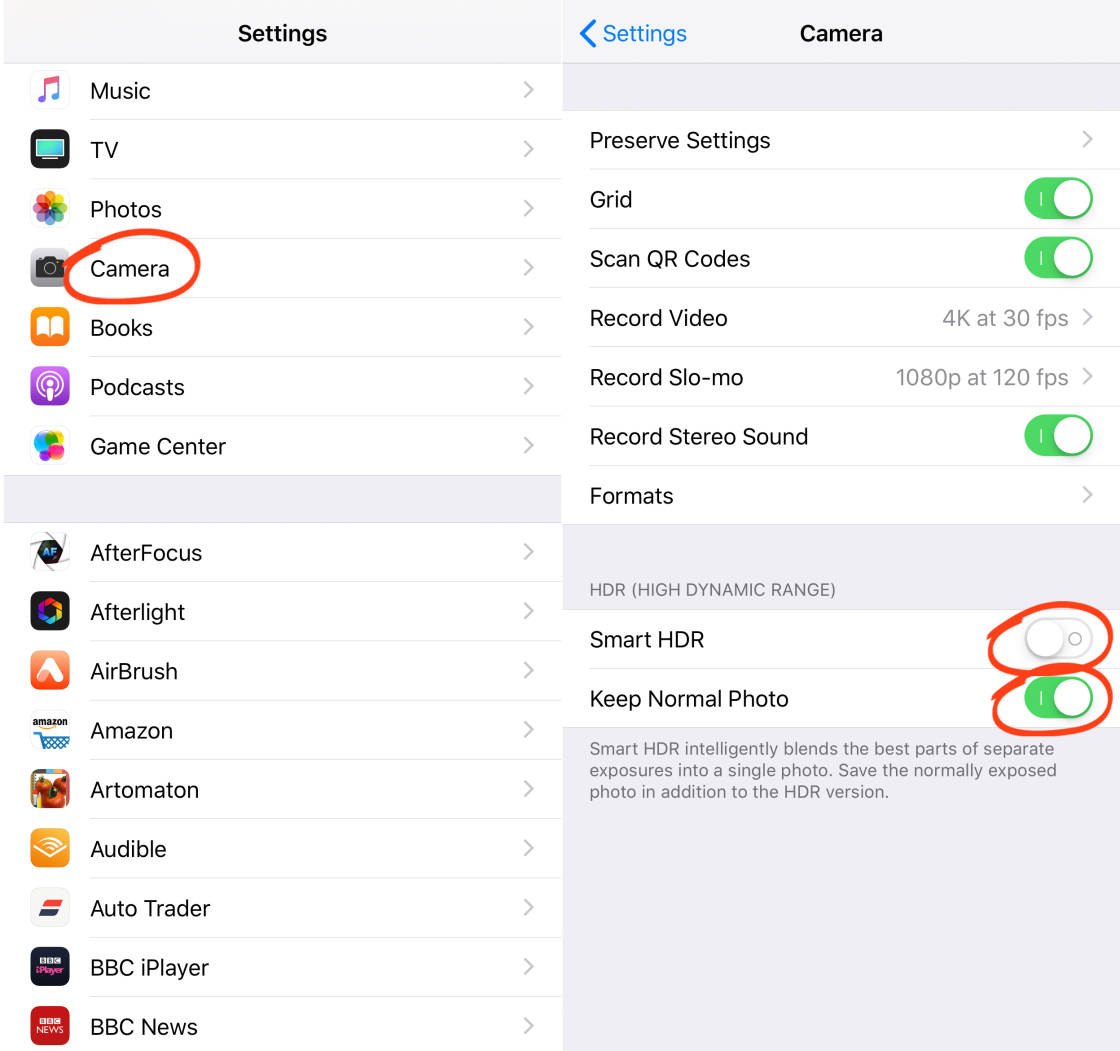
Also, ensure Keep Normal Photo is switched on. This tells your iPhone to save a non-HDR version of the photo too.
Close the Settings app, then open the Camera app.
Ensure the HDR icon at the top of the screen is switched on (the icon appears without a line through it when it’s on).
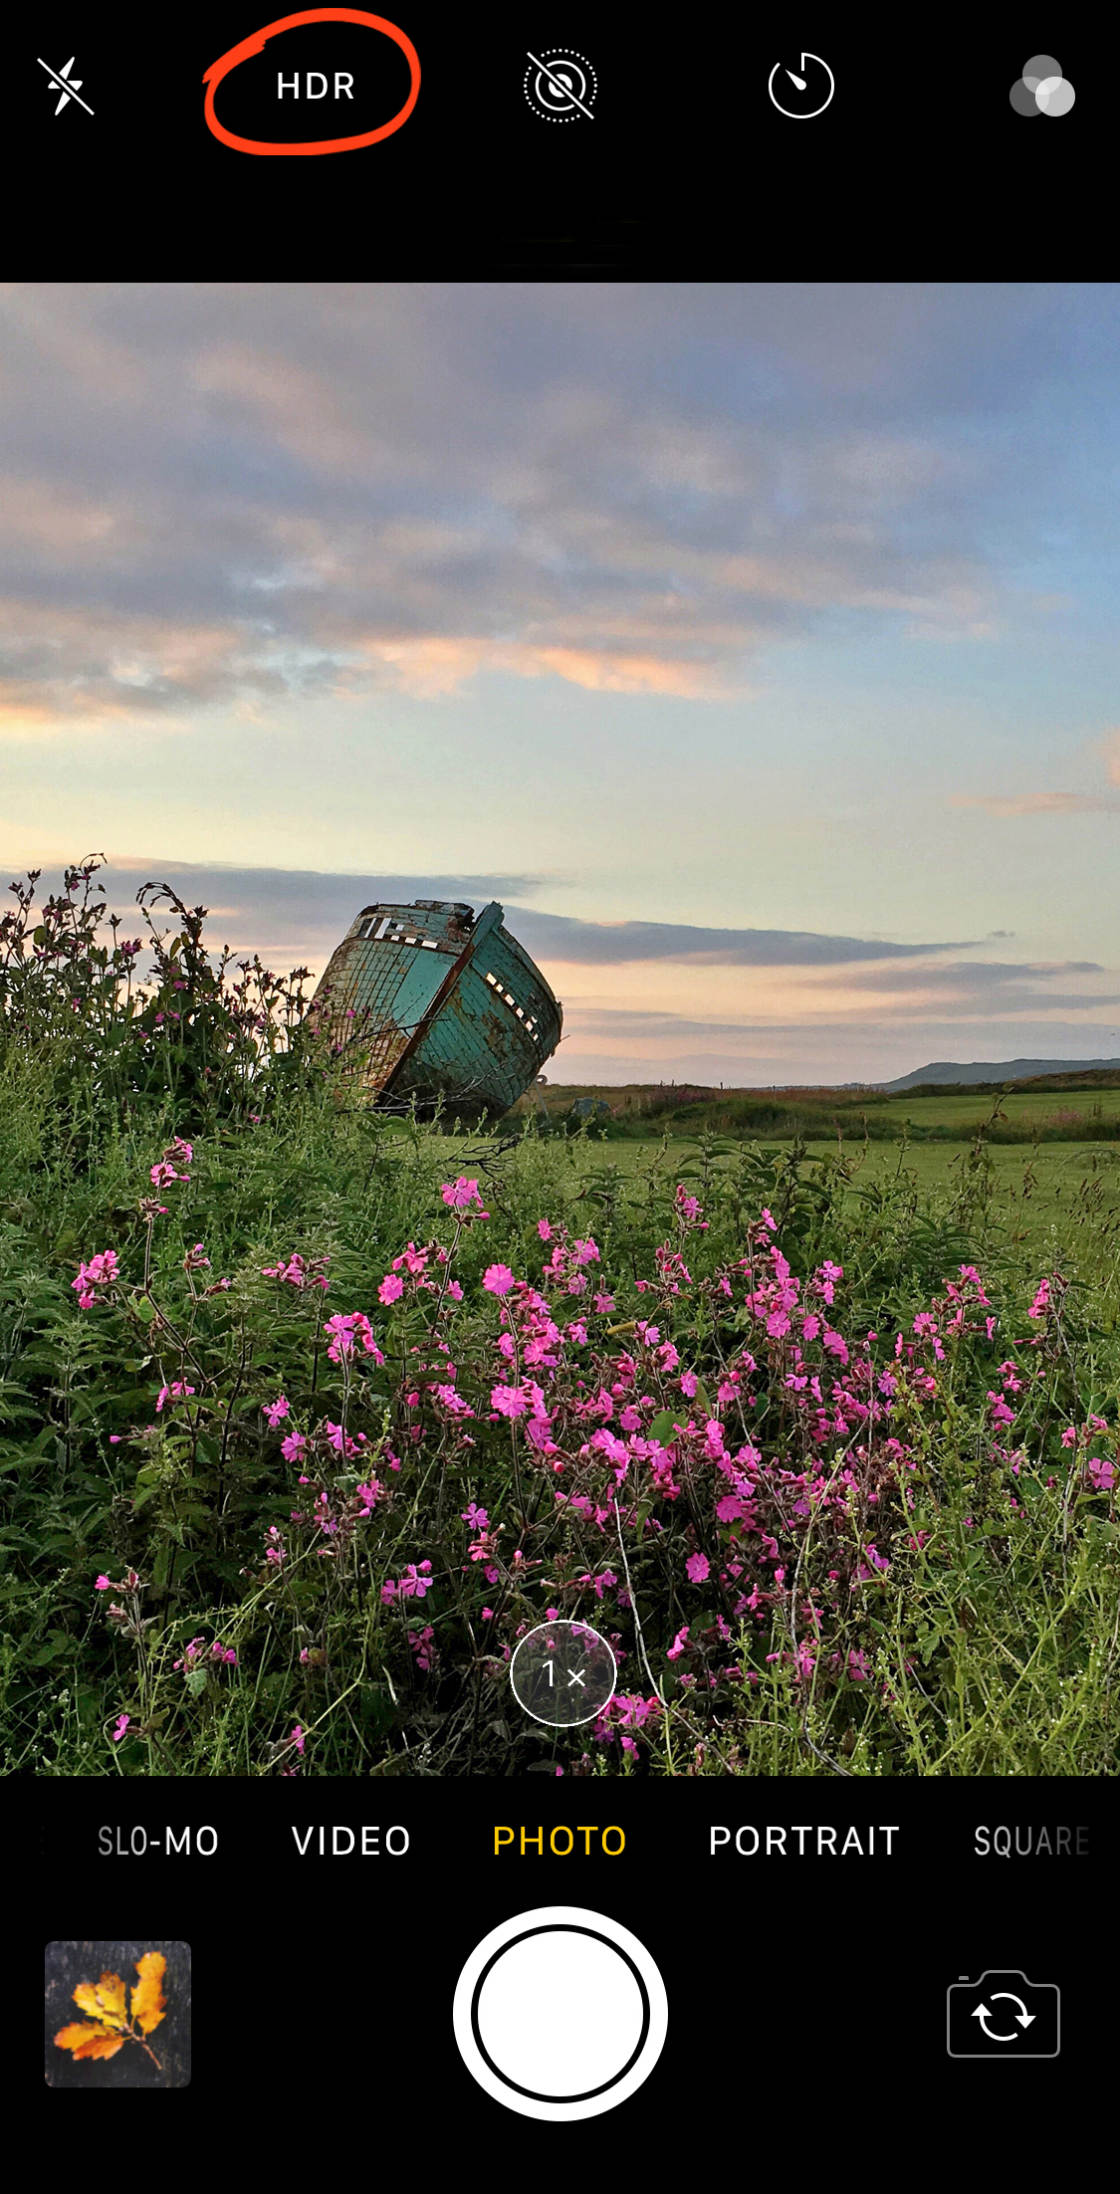
On some older iPhones, you can set HDR to Auto, On or Off. If you have these options, choose On.
When you switch on HDR, your iPhone automatically captures HDR photos whenever you press the shutter button.
Note that it takes slightly longer to capture an HDR photo than a regular one. This is because the camera has to capture three images at different exposures and combine them into a single photo.
Because of the extra time required to take an HDR photo, it’s more likely that you’ll move the iPhone slightly during the capture. Any movement would result in a blurred photo caused by camera shake.
For this reason, it’s important to hold your iPhone very still, or mount your phone on a tripod while taking HDR pictures.
HDR is an amazing tool for helping you create better exposed photos. However, HDR photos don’t always look better than regular ones.
Remember, your iPhone saves a non-HDR version of the photo whenever you shoot an HDR image (as long as you switched on Keep Normal Photo in Settings).
So always compare the HDR and non-HDR versions in the Photos app, and use the one you like the best.
When you no longer want to shoot HDR photos, tap the HDR icon to switch it off.
6. Use Pro HDR X App For Ultimate HDR Control
The HDR feature in the iPhone’s native Camera app is fairly subtle. If you prefer images with a more dramatic HDR effect, you’ll need to download a dedicated HDR app.
One of the best apps for HDR photography is Pro HDR X ($1.99). It has a range of HDR shooting and editing options, allowing you to customize the final result.
The photo below was taken using the Pro HDR X app. It has vibrant colors, and lots of detail in both the shadows and the highlights.
 HDR photo taken with Pro HDR X app
For comparison, below are two photos of the same scene that were shot with the native Camera app. The first image was shot with HDR switched on, and the second one is the non-HDR version.
 HDR photo taken with native Camera app
 Non-HDR photo taken with native Camera app
The difference between the two native camera photos is quite subtle. The HDR photo has more detail in the bright areas of the sky, and slightly more detail in the shadows. But the result is very different compared to the same scene shot with Pro HDR X.
The Pro HDR X app does a great job of creating a balanced exposure throughout the entire scene. It also produces vibrant colors that could normally only be achieved with a photo editing app.
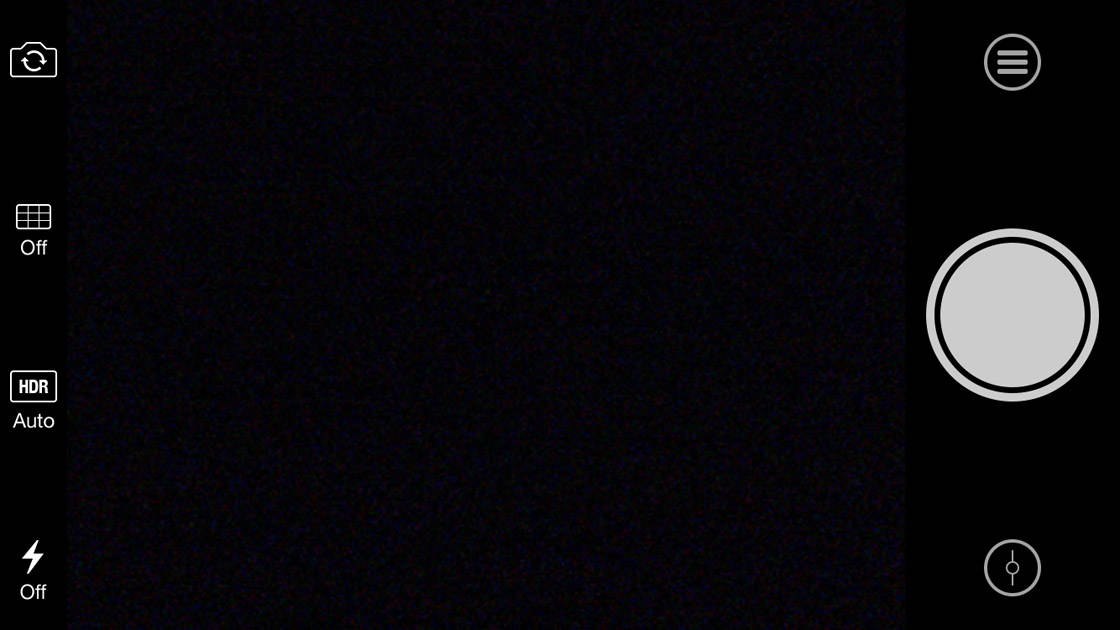
When you’re ready to shoot a HDR photo, open the Pro HDR X app. The camera screen will appear as shown below.
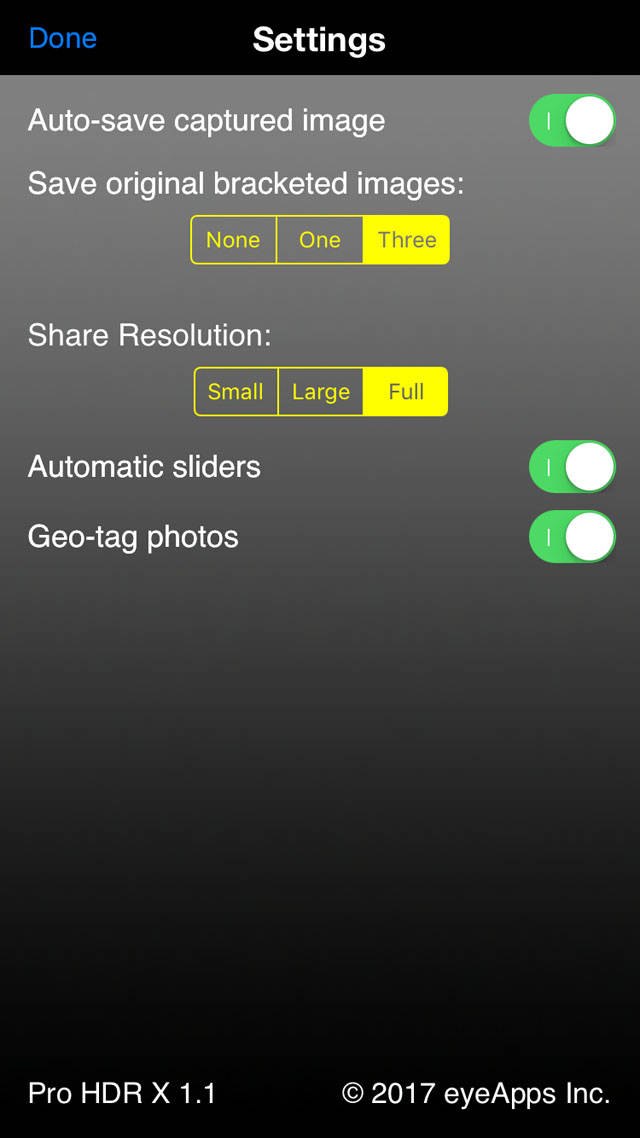
If this is the first time you’ve used the app, it’s worth checking the app settings. Tap the Menu icon (three horizontal lines), then open Settings (gear icon). Check the options are set up as shown below, then tap Done.
Tap HDR on the camera screen to choose between Auto HDR and Manual HDR. You can also turn HDR off to take an ordinary photo with no HDR effect.
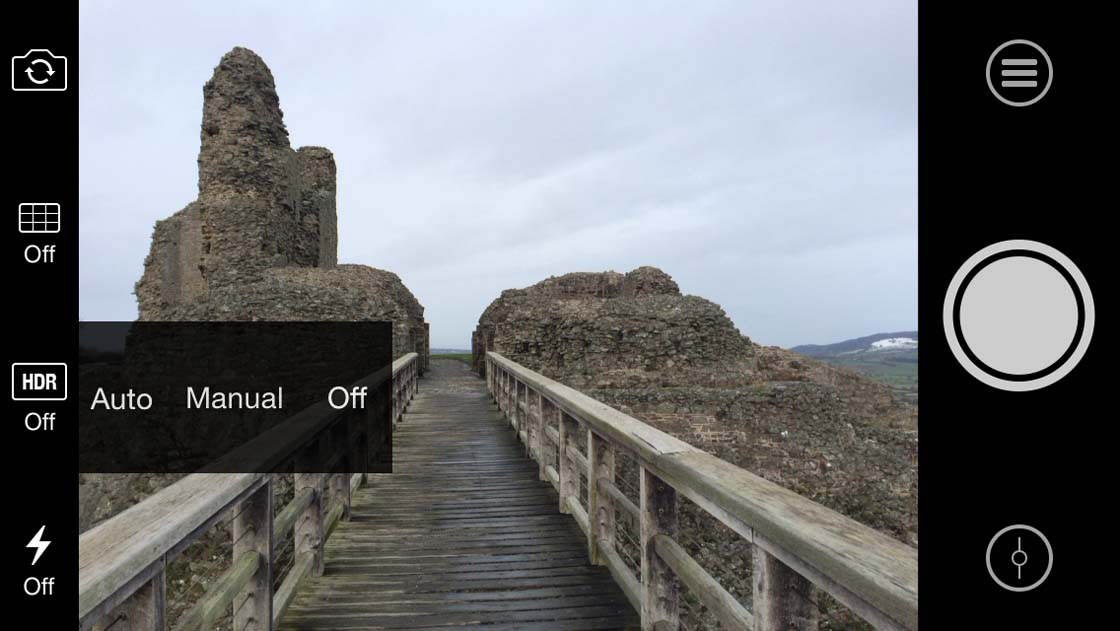
I’d recommend using Auto HDR to start with. But if you’re not getting the results you want, switch to Manual HDR.
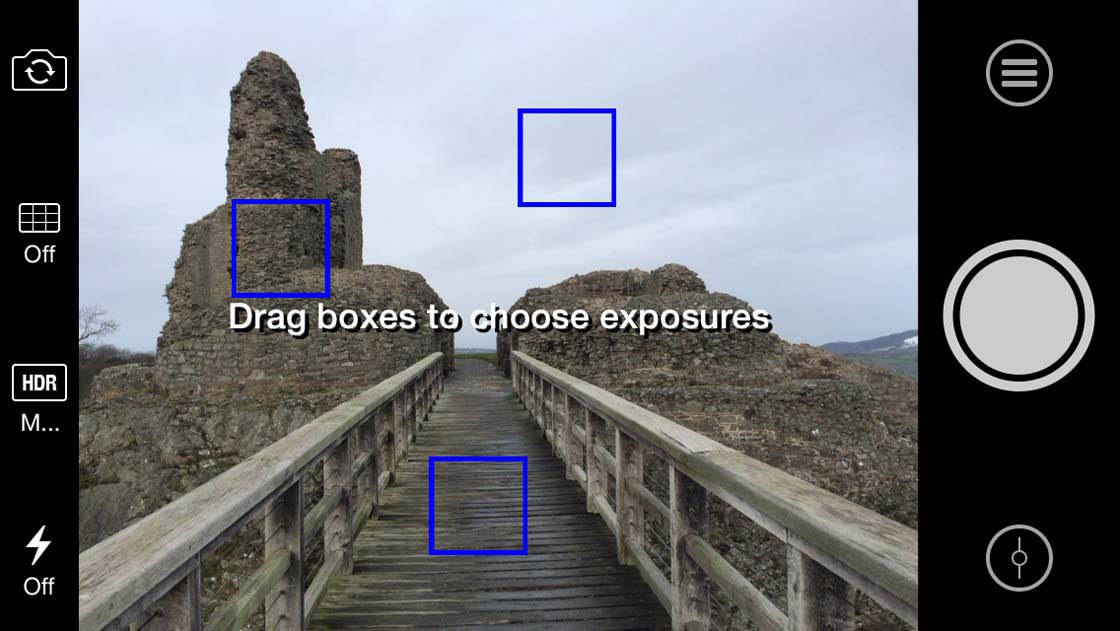
If you choose the Manual HDR option, you’ll see three blue boxes on the screen. Drag these boxes around to select which parts of the image you want to expose for, e.g. sky, a building, and the foreground.
When you press the shutter button, the camera needs to take three separate photos at different exposures. To avoid any blurring in the final image, hold your iPhone steady or mount it on a tripod.
The example below shows what happens if you move your iPhone while the camera is taking the pictures. When the three photos are merged, they don’t align properly. This results in a blurring or “ghosting” effect.
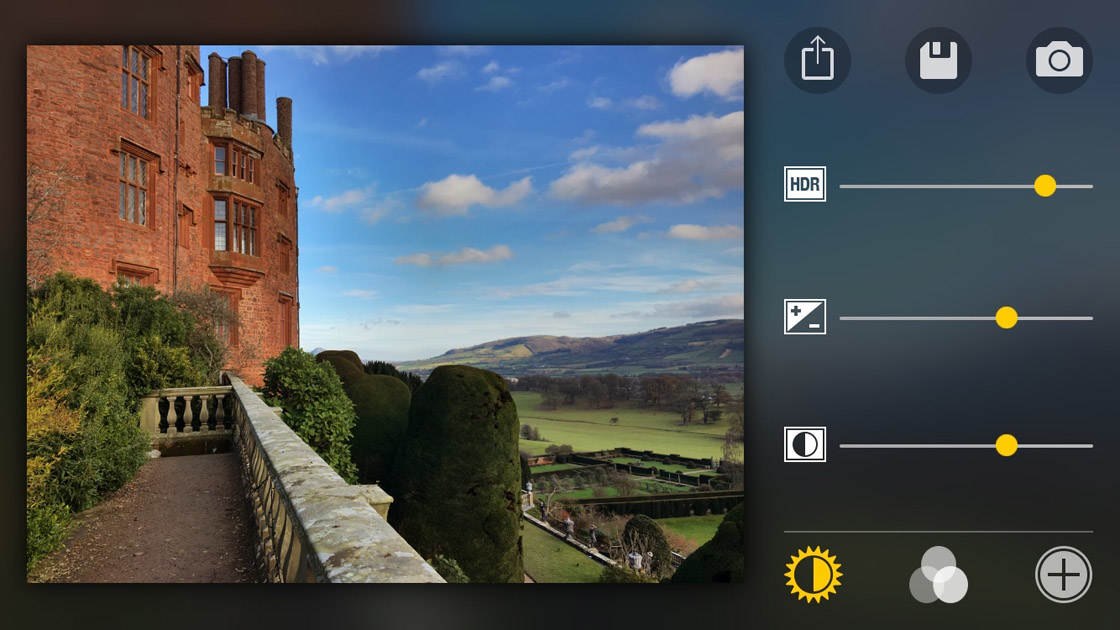
When the app has captured and blended the three exposures, the resulting HDR image is displayed. You’ll also see some icons and sliders as shown below.
The HDR effect can be overpowering to start with. The colors might look over-saturated, and the highlights may appear too dark or grainy. You might also see a bright halo effect around the darker areas of the image.
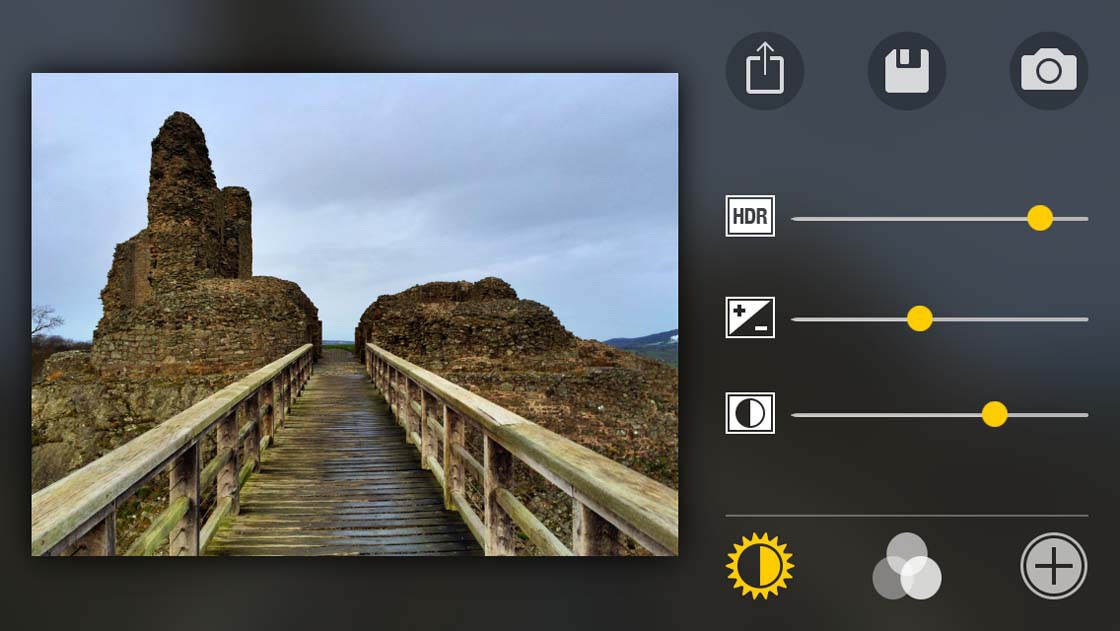
If the HDR effect is too strong, make adjustments to the image using the sliders in the editing panel.
Dial back the HDR slider until you’re happy with the result. There’s also an exposure slider and contrast slider that you can use to fine-tune the image.
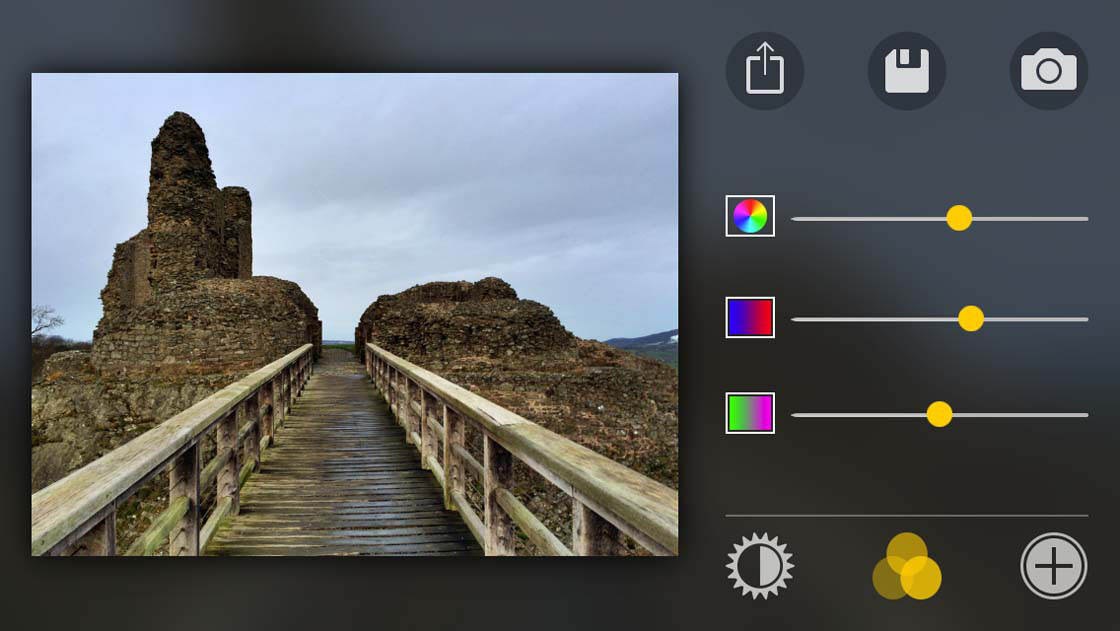
You can access more editing options by tapping the icons at the bottom of the screen. Tap the left icon for exposure sliders, the middle icon for color sliders, and the right icon for cropping, filters, frames and text.
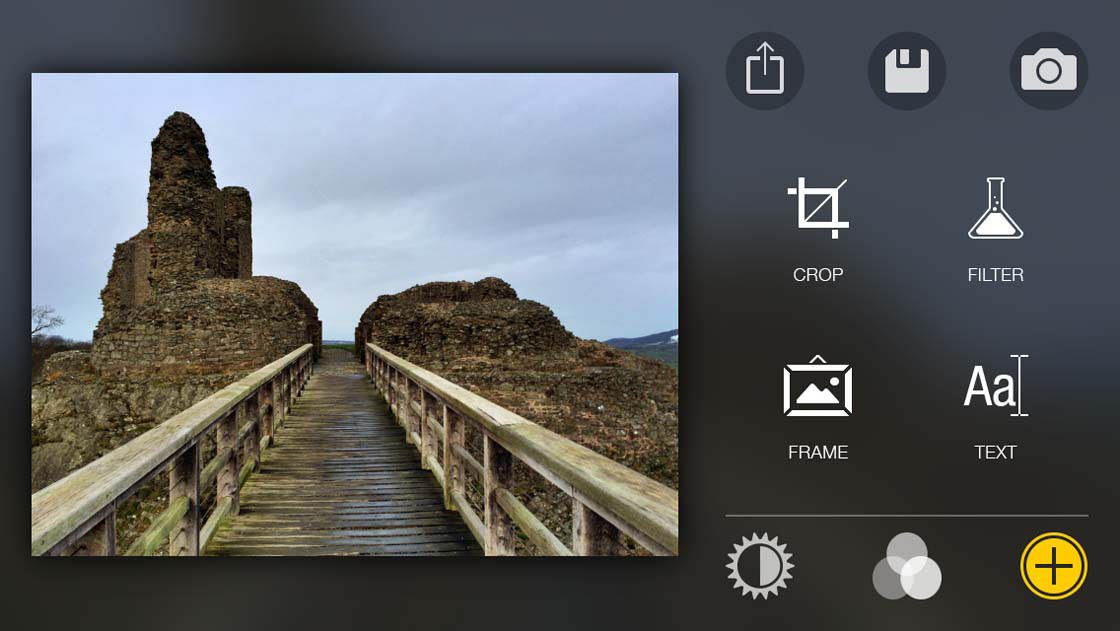
If you use the editing tools to adjust the image, save the edited version to the Photos app by tapping the Save button (floppy disk icon).
If you don’t make any adjustments after taking the photo, tap the camera icon to return to the Pro HDR X camera.
When you open the Photos app to view your images, you’ll see several versions of the same photo. There will be three separate images taken at different exposures, followed by the HDR version which is a combination of the three photos. If you edited the image within the Pro HDR X app, you’ll also see the edited version in the Photos app.
It’s not always convenient to edit the image in Pro HDR X immediately after taking each shot. It’s often easier to take all your photos first, and then tweak the HDR effect later. You can easily do this, as long as you’ve chosen to save THREE bracketed images in the app settings.
To edit the HDR effect after taking photos, tap the Menu icon (three horizontal lines) in Pro HDR X. Then tap the Photo Library icon (between the gear icon and timer icon).
The Library Mode message will appear asking you to select up to three exposures. Tap OK.
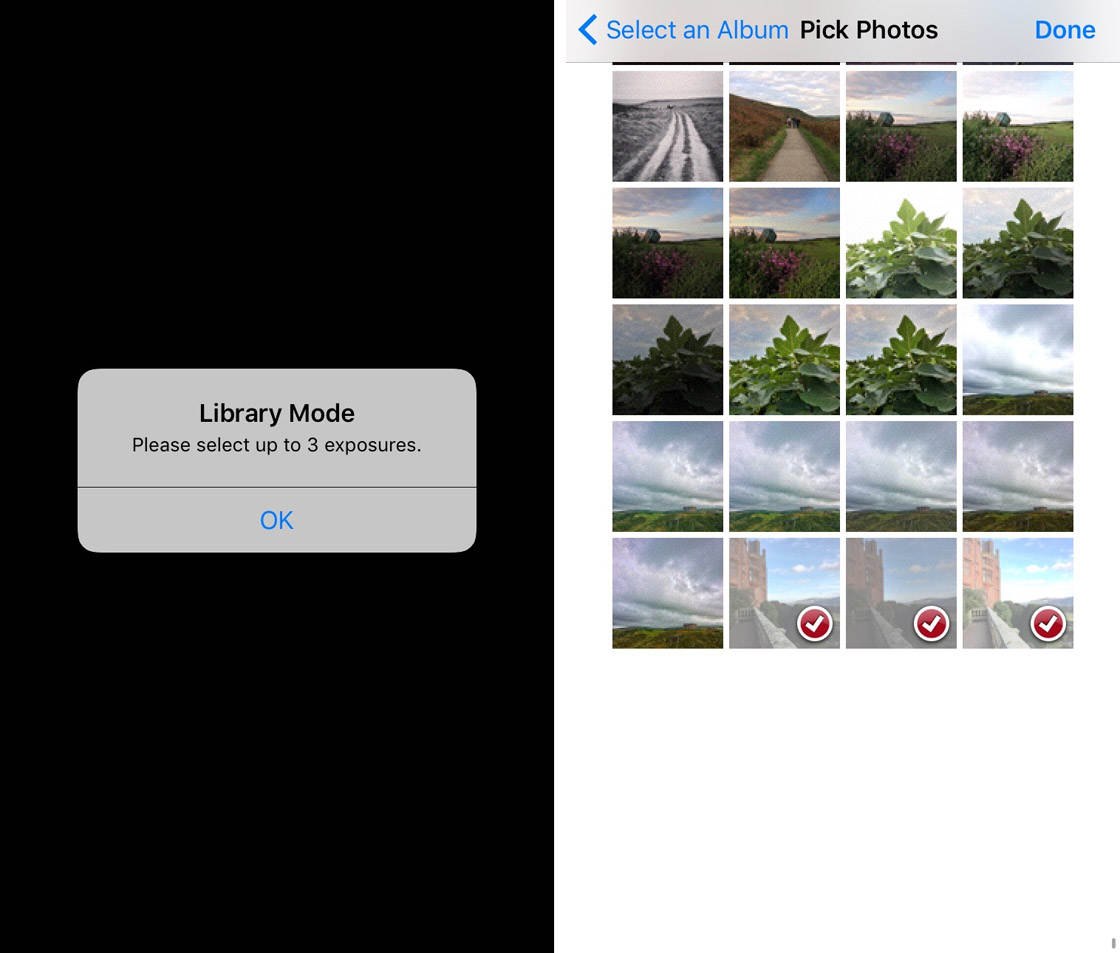
Open the All Photos album, then select the three exposures (dark, bright and medium) that you took with the Pro HDR X app earlier. Tap Done. The three images will be merged to create the HDR photo.
You can now use the Pro HDR X editing tools to customize the HDR effect to your own preferences. Save the image when you’re happy with the edits.