Street photography has had a somewhat turbulent history, sometimes rejected by the mainstream photographic establishment, and also experiencing ethical dilemmas regarding the photographing of people without their consent. Regardless, street photography is now almost universally agreed upon as an important social art form, and the compact size of the iPhone makes it a great camera for taking discreet photographs in public places. In this article you’ll discover six great techniques to help improve your iPhone street photography.
1. Convey A Sense Of Scale
A trap that I often fall into is having the person I’m photographing fill the entire frame. While this can sometimes be a good thing, in a street photo it can tend to weaken the photograph as the viewer loses the sense of place.
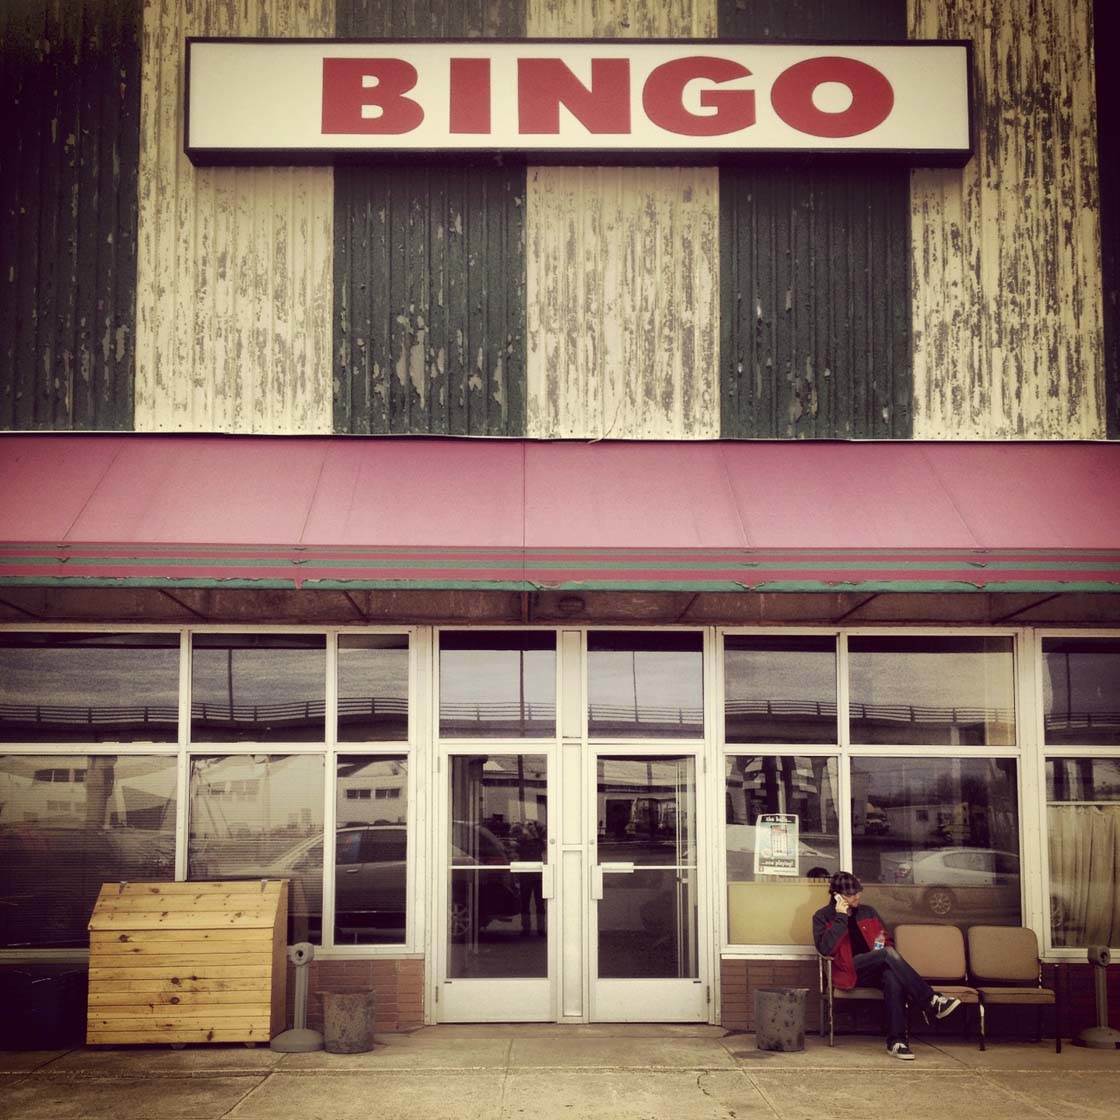
I suggest practicing photographing street scenes where the person is small in the frame, and the surrounding supporting elements (in this case the Bingo hall) tell the story.
In the sense that we’re referring to in this lesson, “scale” refers to the size ratio of the main subject (the person) in relation to the supporting elements (usually the background). Varying the scale of the same scene can elicit very different emotional responses from the viewer.
Give this a try in your own town – find a cool background that tells a story, and ask a friend to stand in for a few test shots. Try a few options at different distances from the subject and background, and see which version you like the best when you’re done taking the test shots.
This is a situation where there are no solid rules. Much of your decision making will come from how you feel when looking at your iPhone screen while composing the shot.
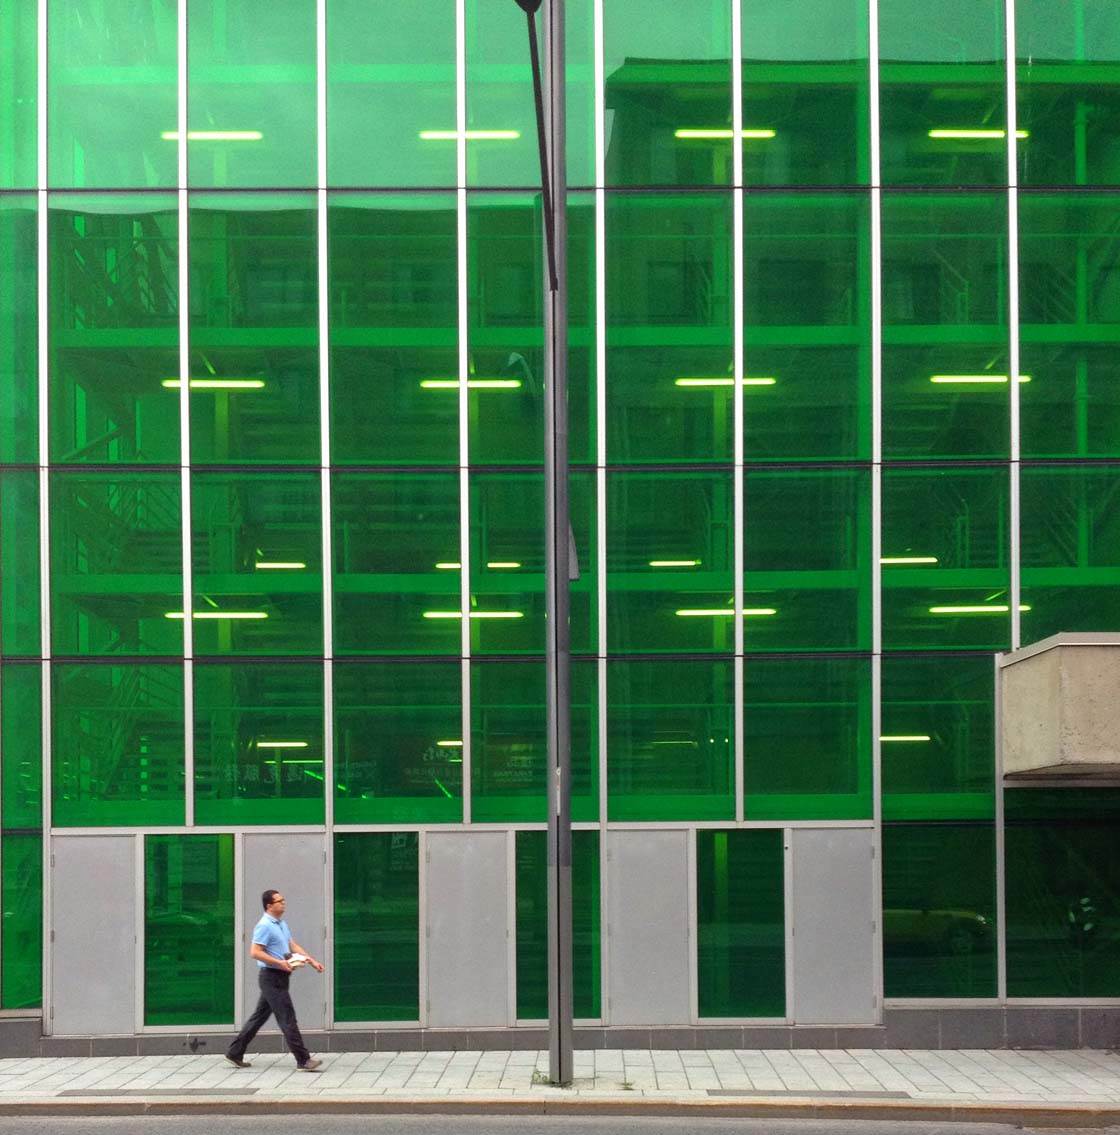
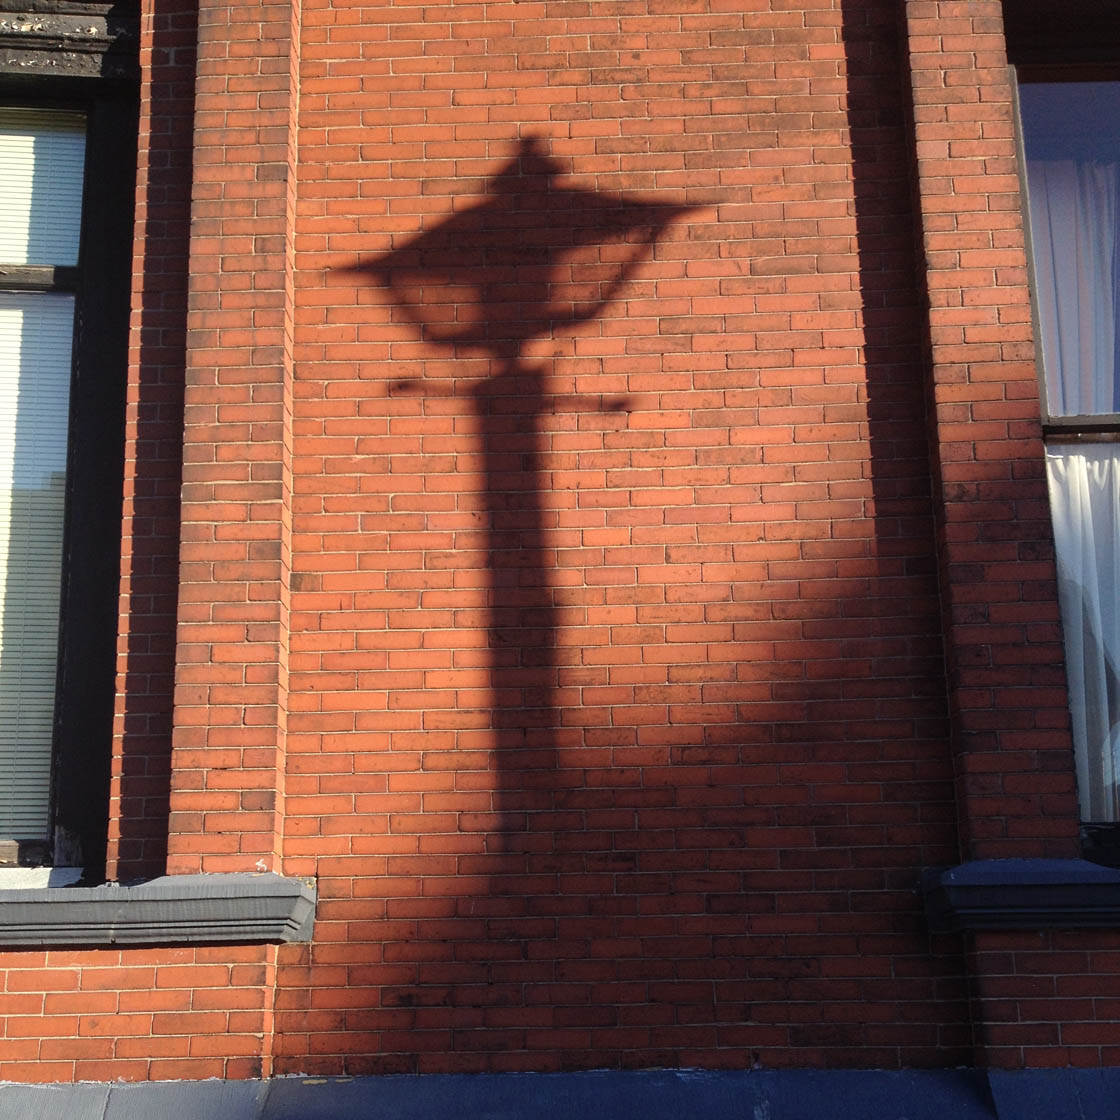
2. Search For Reflections And Shadows
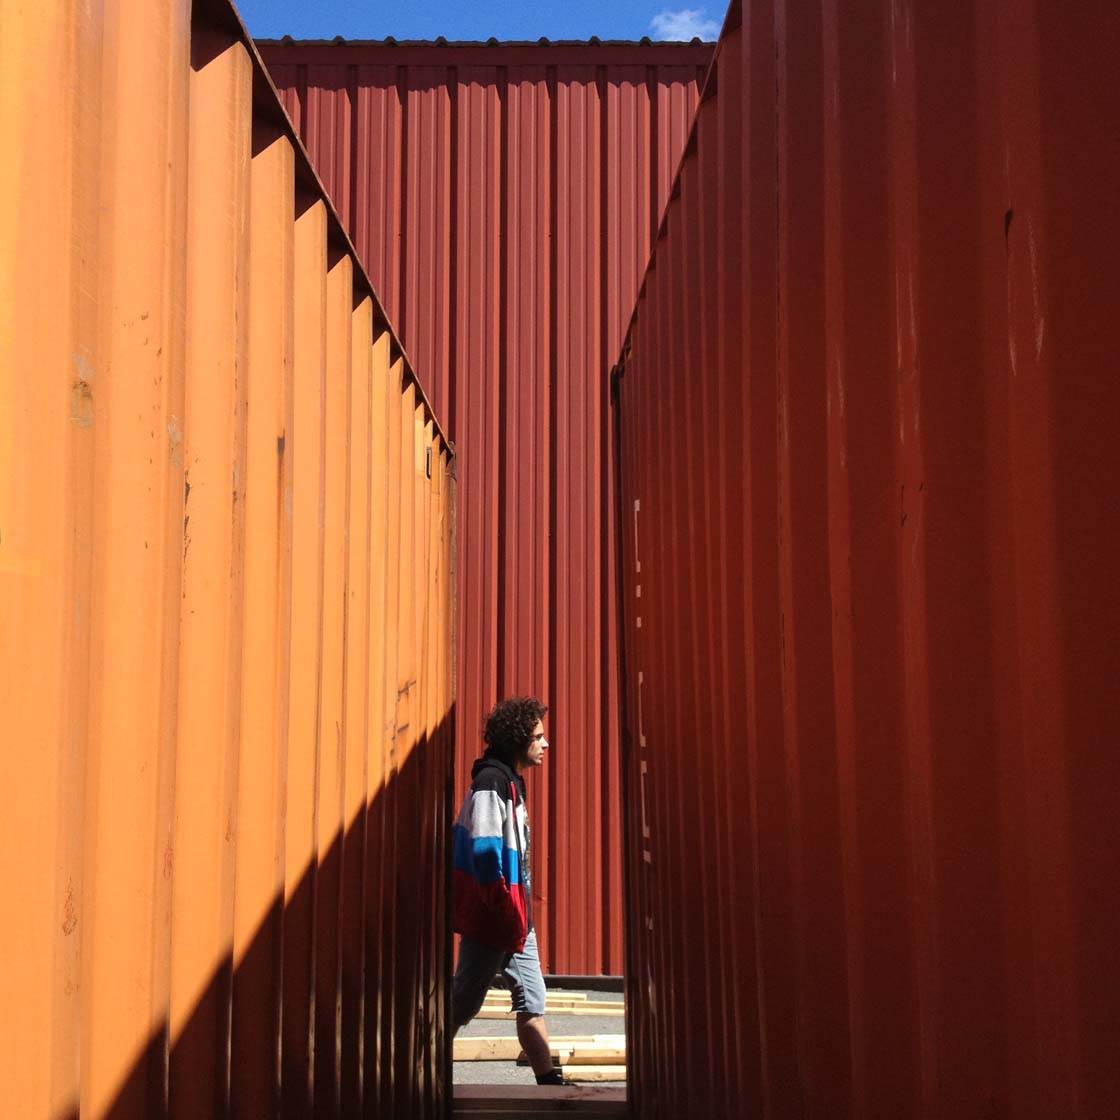
At certain times of the year this red building is blessed with reflections deriving from the sun shining on opposing windows from another building with similar windows. The resultant reflections are always cartoonish and visually interesting.
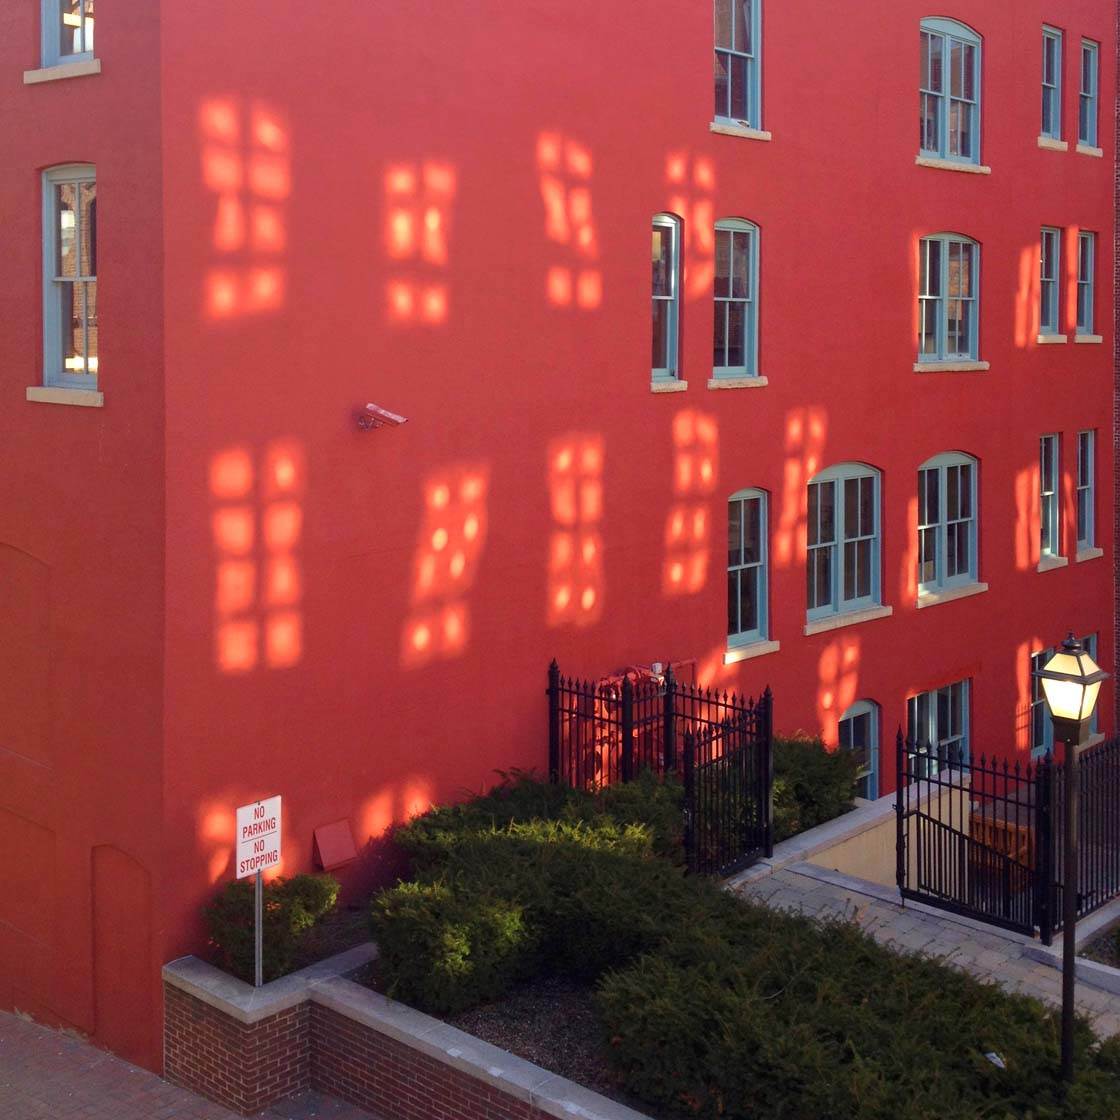
Whenever this happens (usually near supper-time) I point out this scene to the people who I’m walking with. Most often each one of them will look up and with a surprised expression tell me that they’ve never seen those reflections before.
As a professional photographer, every inch of visual real-estate that is before my eyes gets analyzed and judged. I ask myself “Will this scene make for a great photograph?” I’m always looking up when I’m walking, and also side to side, and down towards the ground.
Reflections of any type are favorite photography subjects of mine, and I encourage you to allow the surrounding walls, buildings and streets to act as a canvass to explore shadow and reflection photography.
When my friends look through my Instagram feed they almost always ask how I’m able to see so much more of the same street that they too walk down each day. The answer is to train your mind to search out potential photographic scenes all of your waking day.
This may seem daunting, but why not start out by telling yourself that each time you walk to and from work, you’ll look for interesting reflections or shadows? Tell yourself that you’re going to form a new habit. Say to yourself “Every day I will see the world as a potential for creating art.”
Bad habits come easy, good habits are a bit harder to become ingrained in our mental process. Working toward deepening this habit of “seeing” is certainly worth the effort.
3. Photograph Humor
Friends of mine live on a historic street in Saint John, New Brunswick, Canada (my hometown), where some important and famous Canadian and International public figures once lived. Many of the homes have plaques that were placed by the city that explain the historical significance of the particular home or building.
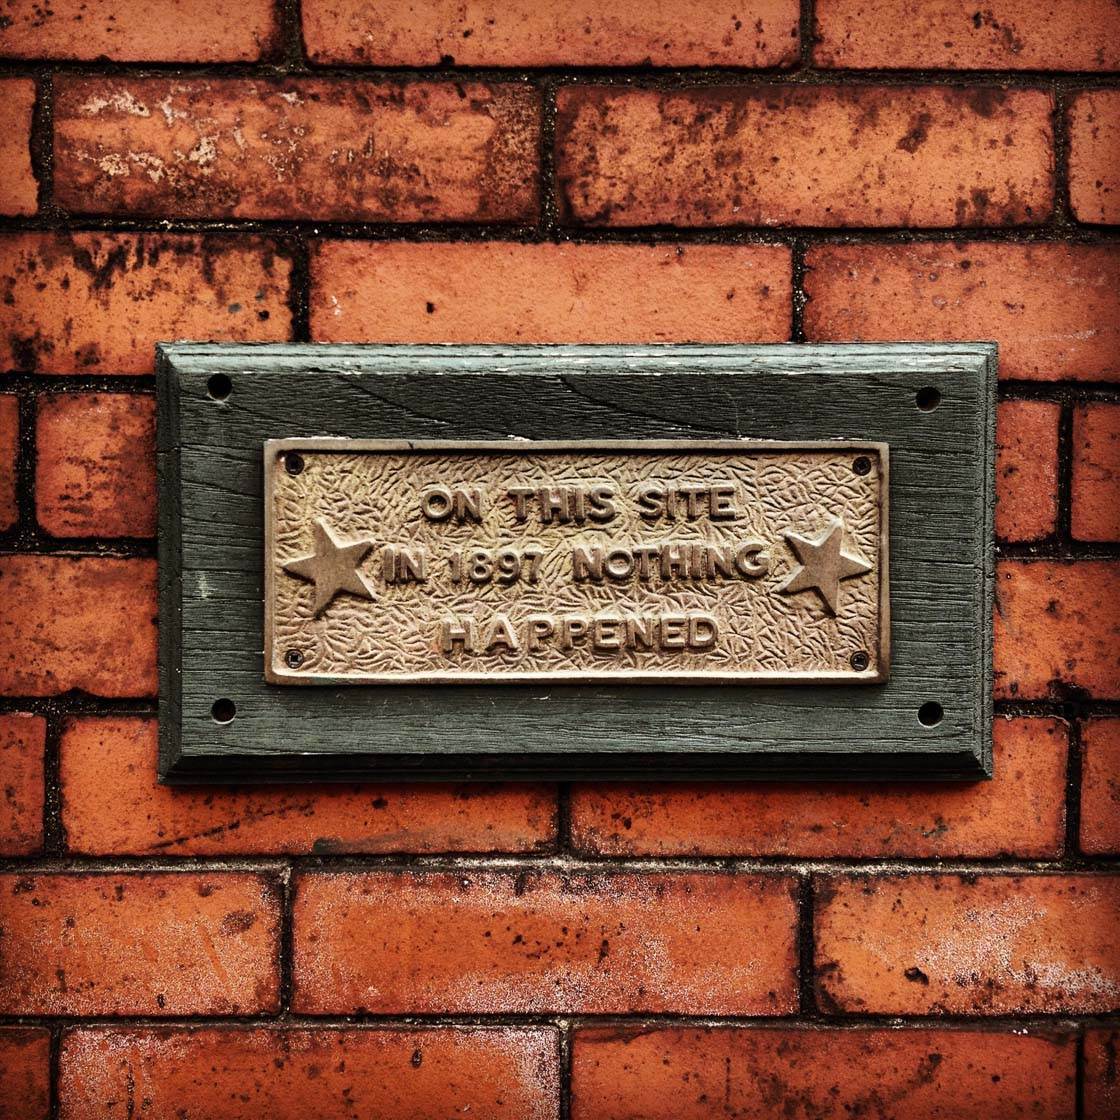
On this house however, it appears that 1897 was a boring year. When walking the streets there will almost always be an opportunity to photograph something funny. Remember, street photography doesn’t always have to have people included in each image. What you are doing is capturing a slice of human interaction within (usually) urban environments.
I once walked by a house in my city with a painting of Elvis proudly displayed in the front window. My guess was that this was not intended to be ironic, thus the enjoyment that I received from taking the image and reading the subsequent funny Instagram comments.
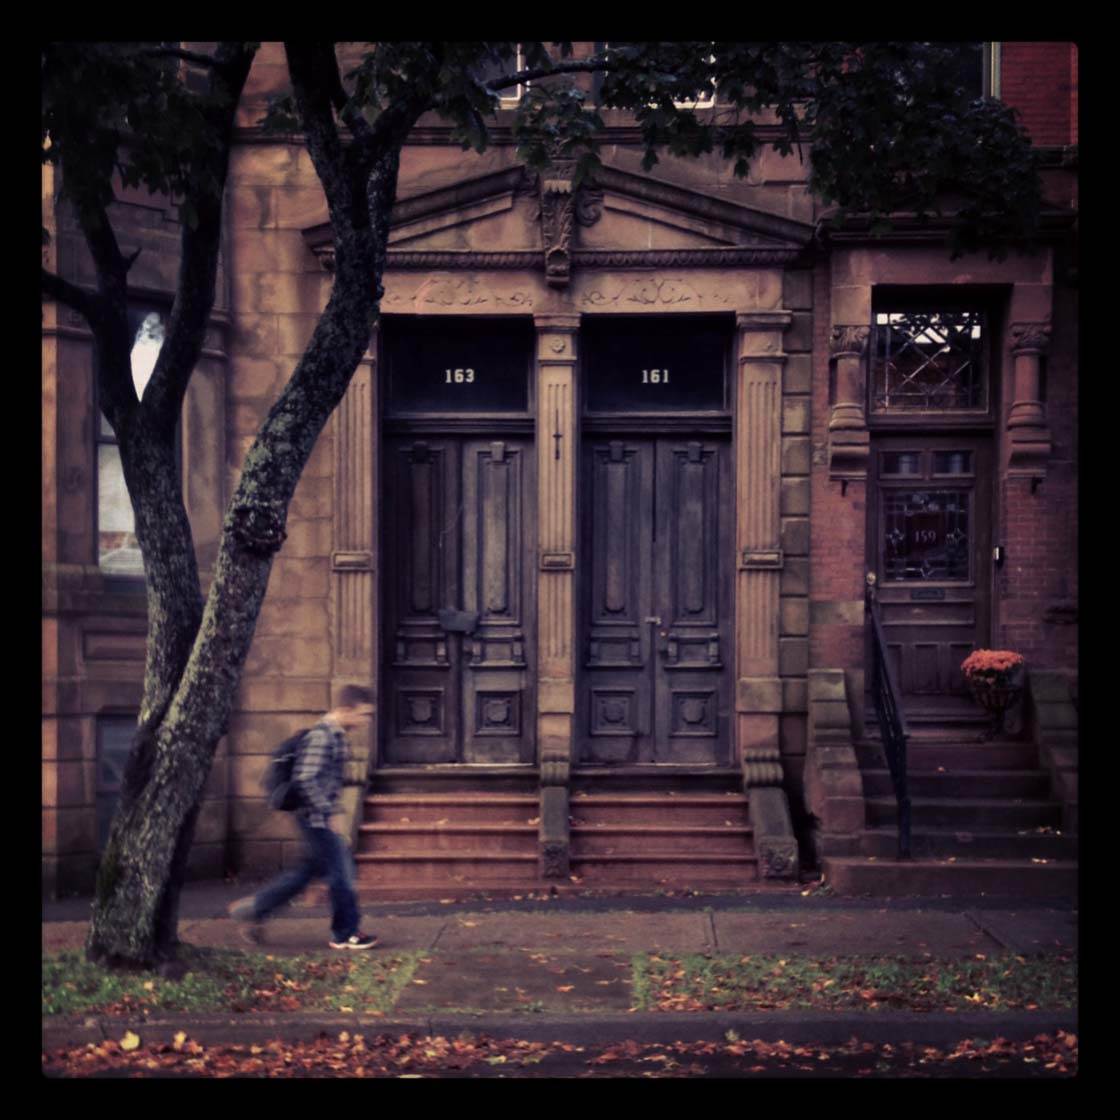
4. Look For Juxtaposition In A Scene
The dictionary definition of juxtaposition is “an act or instance of placing close together or side by side, especially for comparison or contrast.”
When practicing street photography we would do well to always look for two scenes that are different yet complimentary. As in the case of this photo, the historic building and the modern building are juxtaposed and complimentary.
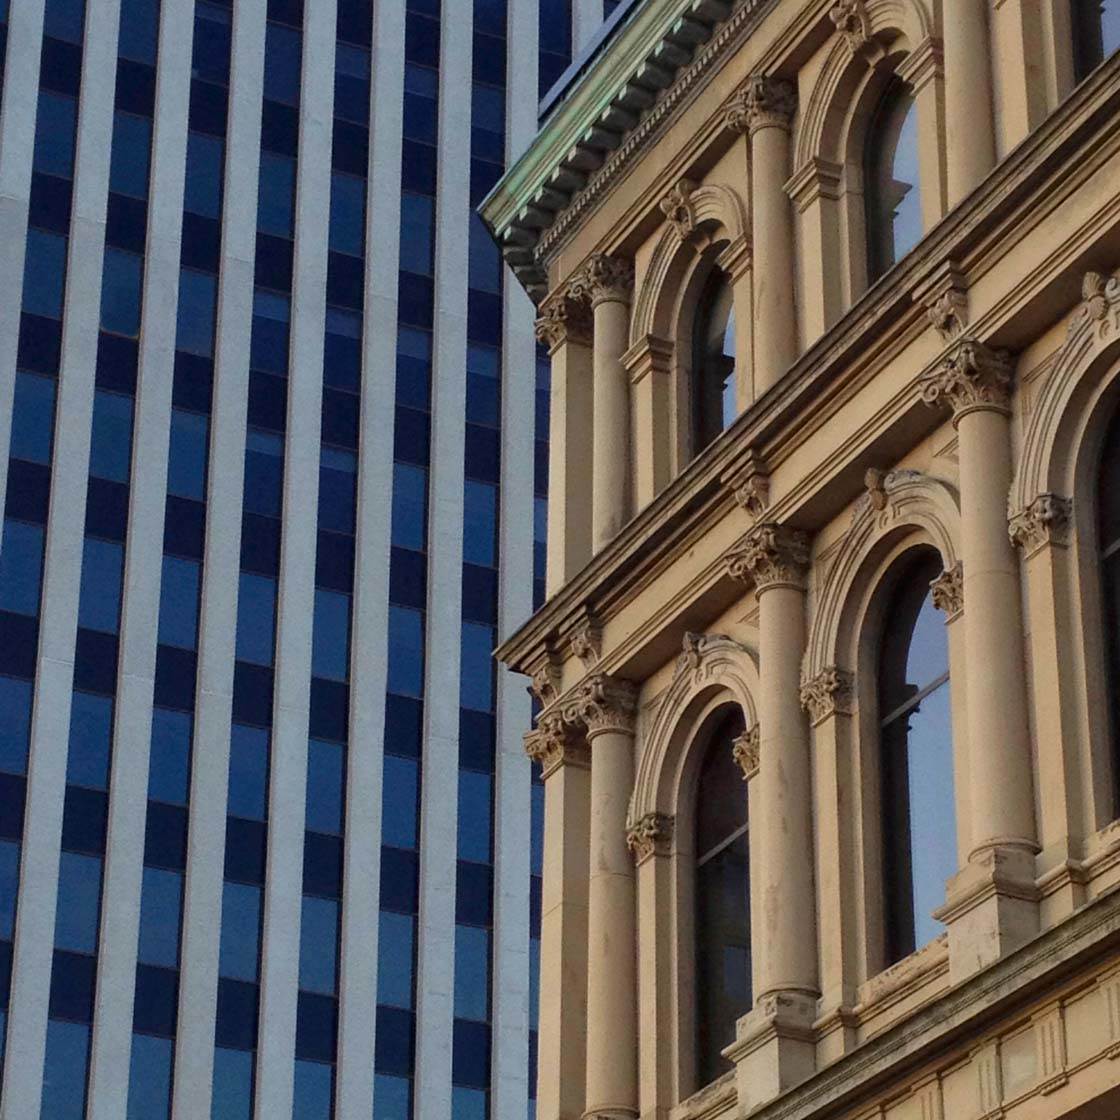
The two subjects are of the same class (buildings), thus have a complimentary aspect. But they are of a vastly different era and architectural style, thus the state of juxtaposition.
Try looking for such juxtaposing scenes in your own city or town, and I’m sure you’ll come up with some really interesting photographs!
5. Pan Your Camera With Moving Subjects
When walking from your car to work, or from your bus to school, I advise everyone to have their iPhone out in their hands, ready to shoot. If your camera is in your pocket, many scenes will have already past before you had a chance to get the camera app ready to roll.
Such was not the case with this group of pigeons, as I was ready with my iPhone in hand. I ran toward the birds expecting a mad rush away from the human intruder, and they reacted as I suspected.
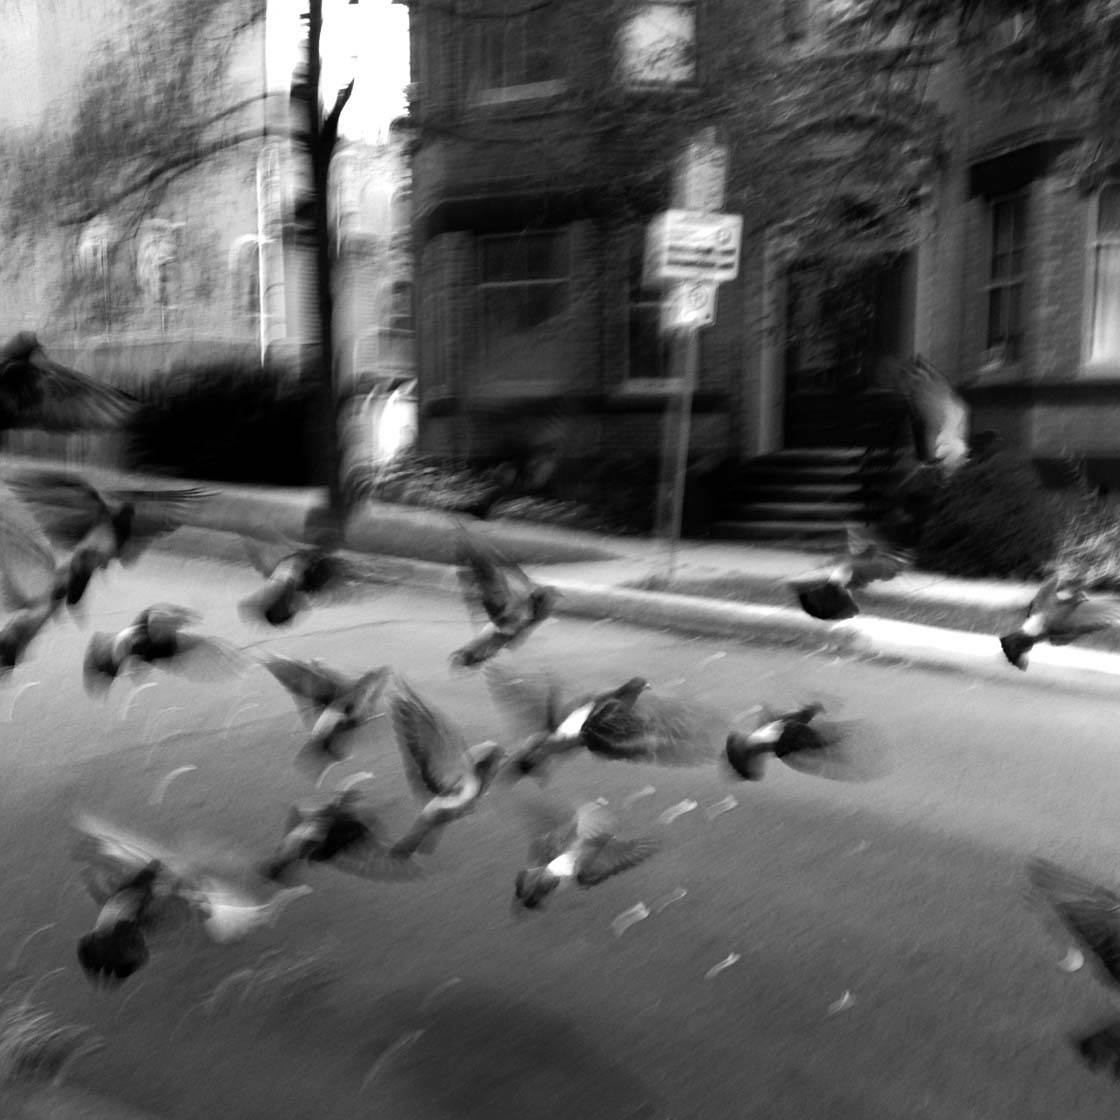
As I took the photo, I panned the iPhone quickly to track their fast-paced movements, and came up with an impressionistic style panning image. Panning is simply the act of moving the camera, usually in the direction of the moving subject, during the exposure.
You too can take advantage of this panning technique whenever you’re confronted with fast moving subjects. The faster you move your iPhone from left to right, up or down, sideways, etc. the more motion blur you will end up with.
Panning isn’t an exact science – for every ten tries you may only get one good image. Practice is key to good panning shots as the more you do it, the more you’ll understand how fast or slow you need to directionally move your iPhone to get the results that you’re after.
6. Convert Your Images To Black And White
I was eating lunch one noon-hour in my local city market when I looked out of the window and saw this worker loading trash into a dumpster. I grabbed my iPhone and took this shot, but I wasn’t very pleased with the result.

Before deleting images that don’t grab me, I often try a black and white conversion to see if the images become bolder and worthy of presenting. By using the native iOS camera editing functions, I turned the photo to black and white, and thought that the image became a bit more visually dynamic.
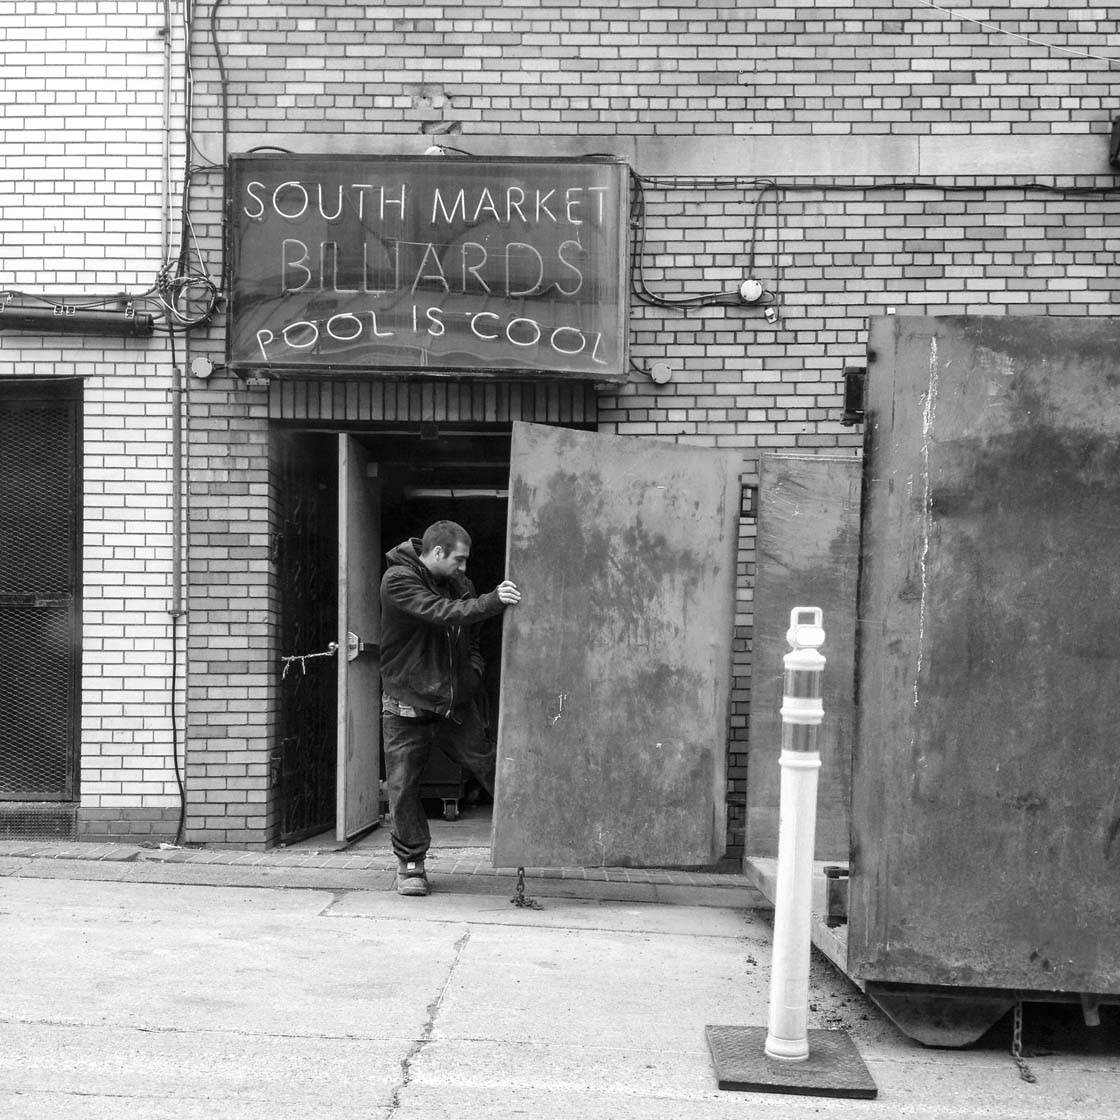
While this photograph is not a favorite of mine, it does illustrate how a simple black and white conversion can often save lacklustre images.
Almost every photo app in existence has the ability to either desaturate your photograph, or give you various black and white options. Give this technique a try prior to deleting your next mildly acceptable iPhone photo.
Conclusion
With these six tips I hope that you can stretch your creative muscles and delve into the dynamic world of street photography. The iPhone is a great tool for this art form, as it’s always with you and ready to fire.
Your biggest challenge will probably be the familiarity of your surroundings. Pretend you’re a tourist photographer seeing your city or town for the first time, and you will have many more photo opportunities present themselves to you. Above all, have fun!
